* This article is part of the original Jobeet Tutorial, created by Fabien Potencier, for Symfony 1.4.
Any website has forms, from the simple contact form to the complex ones with lots of fields. Writing forms is also one of the most complex and tedious task for a web developer: you need to write the HTML form, implement validation rules for each field, process the values to store them in a database, display error messages, repopulate fields in case of errors and much more …
In Day 3 of this tutorial we used the doctrine:generate:crud command to generate a simple CRUD controller for our Job entity. This also generated a Job form that you can find in /src/Ibw/JobeetBundle/Form/JobType.php file.
Customizing the Job Form
The Job form is a perfect example to learn form customization. Let’s see how to customize it, step by step.
First, change the Post a Job link in the layout to be able to check changes directly in your browser:
<a href="{{ path('ibw_job_new') }}">Post a Job</a>Then, change the ibw_job_show route parameters in createAction of the JobController to match the new route we created in day 5 of this tutorial:
// ...

public function createAction(Request $request)
{
    $entity  = new Job();
    $form = $this->createForm(new JobType(), $entity);
    $form->bind($request);

    if ($form->isValid()) {
        $em = $this->getDoctrine()->getManager();

        $em->persist($entity);
        $em->flush();

        return $this->redirect($this->generateUrl('ibw_job_show', array(
            'company' => $entity->getCompanySlug(),
            'location' => $entity->getLocationSlug(),
            'id' => $entity->getId(),
            'position' => $entity->getPositionSlug()
        )));
    }

    return $this->render('IbwJobeetBundle:Job:new.html.twig', array(
        'entity' => $entity,
        'form'   => $form->createView(),
    ));
}

// ...
By default, the Doctrine generated form displays fields for all the table columns. But for the Job form, some of them must not be editable by the end user. Edit the Job form as you see below:
namespace IbwJobeetBundleForm;

use SymfonyComponentFormAbstractType;
use SymfonyComponentFormFormBuilderInterface;
use SymfonyComponentOptionsResolverOptionsResolverInterface;

class JobType extends AbstractType
{
    public function buildForm(FormBuilderInterface $builder, array $options)
    {
        $builder
            ->add('type')
            ->add('category')
            ->add('company')
            ->add('logo')
            ->add('url')
            ->add('position')
            ->add('location')
            ->add('description')
            ->add('how_to_apply')
            ->add('token')
            ->add('is_public')
            ->add('email')
        ;
    }

    public function setDefaultOptions(OptionsResolverInterface $resolver)
    {
        $resolver->setDefaults(array(
            'data_class' => 'IbwJobeetBundleEntityJob'
        ));
    }

    public function getName()
    {
        return 'job';
    }
}
The form configuration must sometimes be more precise than what can be introspected from the database schema. For example, the email column is a varchar in the schema, but we need this column to be validated as an email. In Symfony2, validation is applied to the underlying object (e.g. Job). In other words, the question isn’t whether the form is valid, but whether or not the Job object is valid after the form has applied the submitted data to it. To do this, create a new validation.yml file in the Resources/config directory of our bundle:
IbwJobeetBundleEntityJob:
    properties:
        email:
            - NotBlank: ~
            - Email: ~
Even if the type column is also a varchar in the schema, we want its value to be restricted to a list of choices: full time, part time or freelance.
// ...
use IbwJobeetBundleEntityJob;

class JobType extends AbstractType
{
    public function buildForm(FormBuilderInterface $builder, array $options)
    {
        $builder
            ->add('type', 'choice', array('choices' => Job::getTypes(), 'expanded' => true))
            // ...
    }

    // ...

}
For this to work, add the following methods in the Job entity:
     // ...

    public static function getTypes()
    {
        return array('full-time' => 'Full time', 'part-time' => 'Part time', 'freelance' => 'Freelance');
    }

    public static function getTypeValues()
    {
        return array_keys(self::getTypes());
    }

    // ...
The getTypes() method is used in the form to get the possible types for a Job and getTypeValues() will be used in the validation to get the valid values for the type field.
IbwJobeetBundleEntityJob:
    properties:
        type:
            - NotBlank: ~
            - Choice: { callback: getTypeValues }
        email:
            - NotBlank: ~
            - Email: ~
For each field, symfony automatically generates a label (which will be used in the rendered tag). This can be changed with the label option:
    public function buildForm(FormBuilderInterface $builder, array $options)
    {
        $builder
            // ...
            ->add('logo', null, array('label' => 'Company logo'))
            // ...
            ->add('how_to_apply', null, array('label' => 'How to apply?'))
            // ...
            ->add('is_public', null, array('label' => 'Public?'))
            // ...
    }
You should also add validation constraints for the rest of the fields:
IbwJobeetBundleEntityJob:
    properties:
        category:
            - NotBlank: ~
        type:
            - NotBlank: ~
            - Choice: {callback: getTypeValues}
        company:
            - NotBlank: ~
        position:
            - NotBlank: ~
        location:
            - NotBlank: ~
        description:
            - NotBlank: ~
        how_to_apply:
            - NotBlank: ~
        token:
            - NotBlank: ~
        email:
            - NotBlank: ~
            - Email: ~
        url:
            - Url: ~
The constraint applied to url field enforces the URL format to be like this: http://www.sitename.domain or https://www.sitename.domain.
After modifying validation.yml, you need to clear the cache.
Handling File Uploads in Symfony2
To handle the actual file upload in the form, we will use a virtual file field. For this, we will add a new file property to the Job entity:
    // ...

    public $file;

    // ...
Now we need to replace the logo with the file widget and change it to a file input tag:
// ...

    public function buildForm(FormBuilderInterface $builder, array $options)
    {
        $builder
            // ...
            ->add('file', 'file', array('label' => 'Company logo', 'required' => false))
            // ...
    }
// ...
To make sure the uploaded file is a valid image, we will use the Image validation constraint:
IbwJobeetBundleEntityJob:
    properties:
        # ...
        file:
            - Image: ~
When the form is submitted, the file field will be an instance of UploadedFile. It can be used to move the file to a permanent location. After this, we will set the job logo property to the uploaded file name.
// ...

    public function createAction(Request $request)
    {
        // ...

        if ($form->isValid()) {
            $em = $this->getDoctrine()->getManager();

            $entity->file->move(__DIR__.'/../../../../web/uploads/jobs', $entity->file->getClientOriginalName());
            $entity->setLogo($entity->file->getClientOriginalName());

            $em->persist($entity);
            $em->flush();

            return $this->redirect($this->generateUrl('ibw_job_show', array(
                'company' => $entity->getCompanySlug(),
                'location' => $entity->getLocationSlug(),
                'id' => $entity->getId(),
                'position' => $entity->getPositionSlug()
            )));
        }
        // ...
    }

// ...
You need to create the logo directory (web/uploads/jobs/) and check that it is writable by the web server.
Even if this implementation works, a better way is to handle the file upload using the Doctrine Job entity.
First, add the following to the Job entity:
class Job
{
    // ...
    protected function getUploadDir()
    {
        return 'uploads/jobs';
    }

    protected function getUploadRootDir()
    {
        return __DIR__.'/../../../../web/'.$this->getUploadDir();
    }

    public function getWebPath()
    {
        return null === $this->logo ? null : $this->getUploadDir().'/'.$this->logo;
    }

    public function getAbsolutePath()
    {
        return null === $this->logo ? null : $this->getUploadRootDir().'/'.$this->logo;
    }
}
The logo property stores the relative path to the file and is persisted to the database. The getAbsolutePath() is a convenience method that returns the absolute path to the file while the getWebPath() is a convenience method that returns the web path, which can be used in a template to link to the uploaded file.
We will make the implementation so that the database operation and the moving of the file are atomic: if there is a problem persisting the entity or if the file cannot be saved, then nothing will happen. To do this, we need to move the file right as Doctrine persists the entity to the database. This can be accomplished by hooking into the Job entity lifecycle callback. Like we did in day 3 of the Jobeet tutorial, we will edit the Job.orm.yml file and add the preUpload, upload and removeUpload callbacks in it:
IbwJobeetBundleEntityJob:
    # ...

    lifecycleCallbacks:
        prePersist: [ preUpload, setCreatedAtValue, setExpiresAtValue ]
        preUpdate: [ preUpload, setUpdatedAtValue ]
        postPersist: [ upload ]
        postUpdate: [ upload ]
        postRemove: [ removeUpload ]
Now run the generate:entities doctrine command to add these new methods to the Job entity:
php app/console doctrine:generate:entities IbwJobeetBundle
Edit the Job entity and change the added methods to the following:
class Job
{
    // ...

    /**
     * @ORMPrePersist
     */
    public function preUpload()
    {
         if (null !== $this->file) {
             $this->logo = uniqid().'.'.$this->file->guessExtension();
         }
    }

    /**
     * @ORMPostPersist
     */
    public function upload()
    {
        if (null === $this->file) {
            return;
        }

        // If there is an error when moving the file, an exception will
        // be automatically thrown by move(). This will properly prevent
        // the entity from being persisted to the database on error
        $this->file->move($this->getUploadRootDir(), $this->logo);

        unset($this->file);
    }

    /**
     * @ORMPostRemove
     */
    public function removeUpload()
    {
        if(file_exists($file)) {
            if ($file = $this->getAbsolutePath()) {
                unlink($file);
            }
        }
    }
}
The class now does everything we need: it generates a unique filename before persisting, moves the file after persisting, and removes the file if the entity is ever deleted. Now that the moving of the file is handled atomically by the entity, we should remove the code we added earlier in the controller to handle the upload:
// ...

    public function createAction(Request $request)
    {
        $entity  = new Job();
        $form = $this->createForm(new JobType(), $entity);
        $form->bind($request);

        if ($form->isValid()) {
            $em = $this->getDoctrine()->getManager();

            $em->persist($entity);
            $em->flush();

            return $this->redirect($this->generateUrl('ibw_job_show', array(
                'company' => $entity->getCompanySlug(),
                'location' => $entity->getLocationSlug(),
                'id' => $entity->getId(),
                'position' => $entity->getPositionSlug()
            )));
        }

        return $this->render('IbwJobeetBundle:Job:new.html.twig', array(
            'entity' => $entity,
            'form'   => $form->createView(),
        ));
    }

// ...
The Form Template
Now that the form class has been customized, we need to display it. Open the new.html.twig template and edit it:
{% extends 'IbwJobeetBundle::layout.html.twig' %}

{% form_theme form _self %}

{% block form_errors %}
{% spaceless %}
    {% if errors|length > 0 %}
        <ul class="error_list">
            {% for error in errors %}
                <li>{{ error.messageTemplate|trans(error.messageParameters, 'validators') }}</li>
            {% endfor %}
        </ul>
    {% endif %}
{% endspaceless %}
{% endblock form_errors %}

{% block stylesheets %}
    {{ parent() }}
    <link rel="stylesheet" href="{{ asset('bundles/ibwjobeet/css/job.css') }}" type="text/css" media="all" />
{% endblock %}

{% block content %}
    <h1>Job creation</h1>
    <form action="{{ path('ibw_job_create') }}" method="post" {{ form_enctype(form) }}>
        <table id="job_form">
            <tfoot>
                <tr>
                    <td colspan="2">
                        <input type="submit" value="Preview your job" />
                    </td>
                </tr>
            </tfoot>
            <tbody>
                <tr>
                    <th>{{ form_label(form.category) }}</th>
                    <td>
                        {{ form_errors(form.category) }}
                        {{ form_widget(form.category) }}
                    </td>
                </tr>
                <tr>
                    <th>{{ form_label(form.type) }}</th>
                    <td>
                        {{ form_errors(form.type) }}
                        {{ form_widget(form.type) }}
                    </td>
                </tr>
                <tr>
                    <th>{{ form_label(form.company) }}</th>
                    <td>
                        {{ form_errors(form.company) }}
                        {{ form_widget(form.company) }}
                    </td>
                </tr>
                <tr>
                    <th>{{ form_label(form.file) }}</th>
                    <td>
                        {{ form_errors(form.file) }}
                        {{ form_widget(form.file) }}
                    </td>
                </tr>
                <tr>
                    <th>{{ form_label(form.url) }}</th>
                    <td>
                        {{ form_errors(form.url) }}
                        {{ form_widget(form.url) }}
                    </td>
                </tr>
                <tr>
                    <th>{{ form_label(form.position) }}</th>
                    <td>
                        {{ form_errors(form.position) }}
                        {{ form_widget(form.position) }}
                    </td>
                </tr>
                <tr>
                    <th>{{ form_label(form.location) }}</th>
                    <td>
                        {{ form_errors(form.location) }}
                        {{ form_widget(form.location) }}
                    </td>
                </tr>
                <tr>
                    <th>{{ form_label(form.description) }}</th>
                    <td>
                        {{ form_errors(form.description) }}
                        {{ form_widget(form.description) }}
                    </td>
                </tr>
                <tr>
                    <th>{{ form_label(form.how_to_apply) }}</th>
                    <td>
                        {{ form_errors(form.how_to_apply) }}
                        {{ form_widget(form.how_to_apply) }}
                    </td>
                </tr>
                <tr>
                    <th>{{ form_label(form.token) }}</th>
                    <td>
                        {{ form_errors(form.token) }}
                        {{ form_widget(form.token) }}
                    </td>
                </tr>
                <tr>
                    <th>{{ form_label(form.is_public) }}</th>
                    <td>
                        {{ form_errors(form.is_public) }}
                        {{ form_widget(form.is_public) }}
                        <br /> Whether the job can also be published on affiliate websites or not.
                    </td>
                </tr>
                <tr>
                    <th>{{ form_label(form.email) }}</th>
                    <td>
                        {{ form_errors(form.email) }}
                        {{ form_widget(form.email) }}
                    </td>
                </tr>
            </tbody>
        </table>
    {{ form_end(form) }}
{% endblock %}
We could render the form by just using the following line of code, but as we need more customization, we choose to render each form field by hand.
{{ form(form) }}By printing form(form), each field in the form is rendered, along with a label and error message (if there is one). As easy as this is, it’s not very flexible (yet). Usually, you’ll want to render each form field individually so you can control how the form looks.
We also used a technique named form theming to customize how the form errors will be rendered. You can read more about this in the official Symfony2 documentation.
Do the same thing with the edit.html.twig template:
{% extends 'IbwJobeetBundle::layout.html.twig' %}

{% form_theme edit_form _self %}

{% block form_errors %}
{% spaceless %}
    {% if errors|length > 0 %}
        <ul class="error_list">
            {% for error in errors %}
                <li>{{ error.messageTemplate|trans(error.messageParameters, 'validators') }}</li>
            {% endfor %}
        </ul>
    {% endif %}
{% endspaceless %}
{% endblock form_errors %}

{% block stylesheets %}
    {{ parent() }}
    <link rel="stylesheet" href="{{ asset('bundles/ibwjobeet/css/job.css') }}" type="text/css" media="all" />
{% endblock %}

{% block content %}
    <h1>Job edit</h1>
    <form action="{{ path('ibw_job_update', { 'id': entity.id }) }}" method="post" {{ form_enctype(edit_form) }}>
        <table id="job_form">
            <tfoot>
                <tr>
                    <td colspan="2">
                        <input type="submit" value="Preview your job" />
                    </td>
                </tr>
            </tfoot>
            <tbody>
                <tr>
                    <th>{{ form_label(edit_form.category) }}</th>
                    <td>
                        {{ form_errors(edit_form.category) }}
                        {{ form_widget(edit_form.category) }}
                    </td>
                </tr>
                <tr>
                    <th>{{ form_label(edit_form.type) }}</th>
                    <td>
                        {{ form_errors(edit_form.type) }}
                        {{ form_widget(edit_form.type) }}
                    </td>
                </tr>
                <tr>
                    <th>{{ form_label(edit_form.company) }}</th>
                    <td>
                        {{ form_errors(edit_form.company) }}
                        {{ form_widget(edit_form.company) }}
                    </td>
                </tr>
                <tr>
                    <th>{{ form_label(edit_form.file) }}</th>
                    <td>
                        {{ form_errors(edit_form.file) }}
                        {{ form(edit_form.file) }}
                    </td>
                </tr>
                <tr>
                    <th>{{ form_label(edit_form.url) }}</th>
                    <td>
                        {{ form_errors(edit_form.url) }}
                        {{ form_widget(edit_form.url) }}
                    </td>
                </tr>
                <tr>
                    <th>{{ form_label(edit_form.position) }}</th>
                    <td>
                        {{ form_errors(edit_form.position) }}
                        {{ form_widget(edit_form.position) }}
                    </td>
                </tr>
                <tr>
                    <th>{{ form_label(edit_form.location) }}</th>
                    <td>
                        {{ form_errors(edit_form.location) }}
                        {{ form_widget(edit_form.location) }}
                    </td>
                </tr>
                <tr>
                    <th>{{ form_label(edit_form.description) }}</th>
                    <td>
                        {{ form_errors(edit_form.description) }}
                        {{ form_widget(edit_form.description) }}
                    </td>
                </tr>
                <tr>
                    <th>{{ form_label(edit_form.how_to_apply) }}</th>
                    <td>
                        {{ form_errors(edit_form.how_to_apply) }}
                        {{ form_widget(edit_form.how_to_apply) }}
                    </td>
                </tr>
                <tr>
                    <th>{{ form_label(edit_form.token) }}</th>
                    <td>
                        {{ form_errors(edit_form.token) }}
                        {{ form_widget(edit_form.token) }}
                    </td>
                </tr>
                <tr>
                    <th>{{ form_label(edit_form.is_public) }}</th>
                    <td>
                        {{ form_errors(edit_form.is_public) }}
                        {{ form_widget(edit_form.is_public) }}
                        <br /> Whether the job can also be published on affiliate websites or not.
                    </td>
                </tr>
                <tr>
                    <th>{{ form_label(edit_form.email) }}</th>
                    <td>
                        {{ form_errors(edit_form.email) }}
                        {{ form_widget(edit_form.email) }}
                    </td>
                </tr>
            </tbody>
        </table>
    {{ form_end(edit_form) }}
{% endblock %}
The Form Action
We now have a form class and a template that renders it. Now, it’s time to actually make it work with some actions. The job form is managed by four methods in the JobController:
newAction: Displays a blank form to create a new jobcreateAction: Processes the form (validation, form repopulation) and creates a new job with the user submitted valueseditAction: Displays a form to edit an existing jobupdateAction: Processes the form (validation, form repopulation) and updates an existing job with the user submitted values
When you browse to the /job/new page, a form instance for a new job object is created by calling the createForm() method and passed to the template (newAction).
When the user submits the form (createAction), the form is bound (bind($request) method) with the user submitted values and the validation is triggered.
Once the form is bound, it is possible to check its validity using the isValid() method: if the form is valid (returns true), the job is saved to the database ($em->persist($entity)), and the user is redirected to the job preview page; if not, the new.html.twig template is displayed again with the user submitted values and the associated error messages.
The modification of an existing job is quite similar. The only difference between the new and the edit action is that the job object to be modified is passed as the second argument of the createForm method. This object will be used for default widget values in the template.
You can also define default values for the creation form. For this we will pass a pre-modified Job object to the createForm() method to set the type default value to full-time:
    // ...

    public function newAction()
    {
        $entity = new Job();
        $entity->setType('full-time');
        $form = $this->createForm(new JobType(), $entity);

        return $this->render('IbwJobeetBundle:Job:new.html.twig', array(
            'entity' => $entity,
            'form'   => $form->createView()
        ));
    }

    // ...
PROTECTING THE JOB FORM WITH A TOKEN
Everything must work fine by now. As of now, the user must enter the token for the job. But the job token must be generated automatically when a new job is created, as we don’t want to rely on the user to provide a unique token. Add the setTokenValue method to the prePersist lifecycleCallbacks for the Job entity:
# ...

  lifecycleCallbacks:
     prePersist: [ setTokenValue, preUpload, setCreatedAtValue, setExpiresAtValue ]
     # ...
Regenerate the doctrine entities to apply this modification:
php app/console doctrine:generate:entities IbwJobeetBundle
Edit the setTokenValue() method of the Job entity to add the logic that generates the token before a new job is saved:
    // ...

    public function setTokenValue()
    {
        if(!$this->getToken()) {
            $this->token = sha1($this->getEmail().rand(11111, 99999));
        }
    }

    // ...
You can now remove the token field from the form:
// ...

    public function buildForm(FormBuilderInterface $builder, array $options)
    {
        $builder
            ->add('category')
            ->add('type', 'choice', array('choices' => Job::getTypes(), 'expanded' => true))
            ->add('company')
            ->add('file', 'file', array('label' => 'Company logo', 'required' => false))
            ->add('url')
            ->add('position')
            ->add('location')
            ->add('description')
            ->add('how_to_apply', null, array('label' => 'How to apply?'))
            ->add('is_public', null, array('label' => 'Public?'))
            ->add('email')
        ;
    }

// ...
Remove it from the new.html.twig and edit.html.twig templates also:
<!-- ... -->
<tr>
    <th>{{ form_label(form.token) }}</th>
    <td>
        {{ form_errors(form.token) }}
        {{ form_widget(form.token) }}
    </td>
</tr>
<!-- ... -->
<!-- ... -->
<tr>
<th>{{ form_label(edit_form.token) }}</th>
<td>
{{ form_errors(edit_form.token) }}
{{ form(edit_form.token) }}
</td>
</tr>
<!-- ... -->And from the validation.yml file:
# ...
    # ...
    token:
        - NotBlank: ~
If you remember the user stories from day 2, a job can be edited only if the user knows the associated token. Right now, it is pretty easy to edit or delete any job, just by guessing the URL. That’s because the edit URL is like /job/ID/edit, where ID is the primary key of the job.
Let’s change the routes so you can edit or delete a job only if you now the secret token:
# ...

ibw_job_edit:
    pattern:  /{token}/edit
    defaults: { _controller: "IbwJobeetBundle:Job:edit" }

ibw_job_update:
    pattern:  /{token}/update
    defaults: { _controller: "IbwJobeetBundle:Job:update" }
    requirements: { _method: post|put }

ibw_job_delete:
    pattern:  /{token}/delete
    defaults: { _controller: "IbwJobeetBundle:Job:delete" }
    requirements: { _method: post|delete }
Now edit the JobController to use the token instead of the id:
// ...
class JobController extends Controller
{
    // ...

    public function editAction($token)
    {
        $em = $this->getDoctrine()->getManager();

        $entity = $em->getRepository('IbwJobeetBundle:Job')->findOneByToken($token);

        if (!$entity) {
            throw $this->createNotFoundException('Unable to find Job entity.');
        }

        $editForm = $this->createForm(new JobType(), $entity);
        $deleteForm = $this->createDeleteForm($token);

        return $this->render('IbwJobeetBundle:Job:edit.html.twig', array(
            'entity'      => $entity,
            'edit_form'   => $editForm->createView(),
            'delete_form' => $deleteForm->createView(),
        ));
    }

    public function updateAction(Request $request, $token)
    {
        $em = $this->getDoctrine()->getManager();

        $entity = $em->getRepository('IbwJobeetBundle:Job')->findOneByToken($token);

        if (!$entity) {
            throw $this->createNotFoundException('Unable to find Job entity.');
        }

        $editForm   = $this->createForm(new JobType(), $entity);
        $deleteForm = $this->createDeleteForm($token);

        $editForm->bind($request);

        if ($editForm->isValid()) {
            $em->persist($entity);
            $em->flush();

            return $this->redirect($this->generateUrl('ibw_job_edit', array('token' => $token)));
        }

        return $this->render('IbwJobeetBundle:Job:edit.html.twig', array(
            'entity'      => $entity,
            'edit_form'   => $editForm->createView(),
            'delete_form' => $deleteForm->createView(),
        ));
    }

    public function deleteAction(Request $request, $token)
    {
        $form = $this->createDeleteForm($token);
        $form->bind($request);

        if ($form->isValid()) {
            $em = $this->getDoctrine()->getManager();
            $entity = $em->getRepository('IbwJobeetBundle:Job')->findOneByToken($token);

            if (!$entity) {
                throw $this->createNotFoundException('Unable to find Job entity.');
            }

            $em->remove($entity);
            $em->flush();
        }

        return $this->redirect($this->generateUrl('ibw_job'));
    }

    /**
     * Creates a form to delete a Job entity by id.
     *
     * @param mixed $id The entity id
     *
     * @return SymfonyComponentFormForm The form
     */
    private function createDeleteForm($token)
    {
        return $this->createFormBuilder(array('token' => $token))
            ->add('token', 'hidden')
            ->getForm()
        ;
    }
}
In the job show template show.html.twig, change the ibw_job_edit route parameter:
<a href="{{ path('ibw_job_edit', {'token': entity.token}) }}">Do the same for ibw_job_update route in edit.html.twig job template:
<form action="{{ path('ibw_job_update', {'token': entity.token}) }}" method="post" {{ form_enctype(edit_form) }}>Now, all routes related to the jobs, except the job_show_user one, embed the token. For instance, the route to edit a job is now of the following pattern:
http://jobeet.local/job/TOKEN/edit
The Preview Page
The preview page is the same as the job page display. The only difference is that the job preview page will be accessed using the job token instead of the job id:
# ...

ibw_job_show:
    pattern:  /{company}/{location}/{id}/{position}
    defaults: { _controller: "IbwJobeetBundle:Job:show" }
    requirements:
        id:  d+

ibw_job_preview:
    pattern:  /{company}/{location}/{token}/{position}
    defaults: { _controller: "IbwJobeetBundle:Job:preview" }
    requirements:
        token:  w+

# ...
The preview action (here the difference from the show action is that the job is retrieved from the database using the provided token instead of the id):
// ...

    public function previewAction($token)
    {
        $em = $this->getDoctrine()->getManager();

        $entity = $em->getRepository('IbwJobeetBundle:Job')->findOneByToken($token);

        if (!$entity) {
            throw $this->createNotFoundException('Unable to find Job entity.');
        }

        $deleteForm = $this->createDeleteForm($entity->getId());

        return $this->render('IbwJobeetBundle:Job:show.html.twig', array(
            'entity'      => $entity,
            'delete_form' => $deleteForm->createView(),
        ));
    }

// ...
If the user comes in with the tokenized URL, we will add an admin bar at the top. At the beginning of the show.html.twig template, include a template to host the admin bar and remove the edit link at the bottom:
<!-- ... -->

{% block content %}
    {% if app.request.get('token') %}
        {% include 'IbwJobeetBundle:Job:admin.html.twig' with {'job': entity} %}
    {% endif %}

 <!-- ... -->

{% endblock %}
Then, create the admin.html.twig template:
<div id="job_actions">
<h3>Admin</h3>
<ul>
{% if not job.isActivated %}
<li><a href="{{ path('ibw_job_edit', { 'token': job.token }) }}">Edit</a></li>
<li><a href="{{ path('ibw_job_edit', { 'token': job.token }) }}">Publish</a></li>
{% endif %}
<li>
<form action="{{ path('ibw_job_delete', { 'token': job.token }) }}" method="post">
{{ form_widget(delete_form) }}
<button type="submit" onclick="if(!confirm('Are you sure?')) { return false; }">Delete</button>
</form>
</li>
{% if job.isActivated %}
<li {% if job.expiresSoon %} class="expires_soon" {% endif %}>
{% if job.isExpired %}
Expired
{% else %}
Expires in <strong>{{ job.getDaysBeforeExpires }}</strong> days
{% endif %}
{% if job.expiresSoon %}
- <a href="">Extend</a> for another 30 days
{% endif %}
</li>
{% else %}
<li>
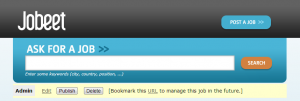
[Bookmark this <a href="{{ url('ibw_job_preview', { 'token': job.token, 'company': job.companyslug, 'location': job.locationslug, 'position': job.positionslug }) }}">URL</a> to manage this job in the future.]
</li>
{% endif %}
</ul>
</div>There is a lot of code, but most of the code is simple to understand.
To make the template more readable, we have added a bunch of shortcut methods in the Job entity class:
    // ...

    public function isExpired()
    {
        return $this->getDaysBeforeExpires() < 0;
    }

    public function expiresSoon()
    {
        return $this->getDaysBeforeExpires() < 5;
    }

    public function getDaysBeforeExpires()
    {
        return ceil(($this->getExpiresAt()->format('U') - time()) / 86400);
    }

    // ...
The admin bar displays the different actions depending on the job status:
We will now redirect the create and update actions of the JobController to the new preview page:
public function createAction(Request $request)
{
    // ...
    if ($form->isValid()) {
        // ...
        return $this->redirect($this->generateUrl('ibw_job_preview', array(
            'company' => $entity->getCompanySlug(),
            'location' => $entity->getLocationSlug(),
            'token' => $entity->getToken(),
            'position' => $entity->getPositionSlug()
        )));
    }
    // ...
}

public function updateAction(Request $request, $token)
{
    // ...
    if ($editForm->isValid()) {
        // ...

        return $this->redirect($this->generateUrl('ibw_job_preview', array(
            'company' => $entity->getCompanySlug(),
            'location' => $entity->getLocationSlug(),
            'token' => $entity->getToken(),
            'position' => $entity->getPositionSlug()
        )));
    }
    // ...
}
As we said before, you can edit a job only if you know the job token and you’re the admin of the site. At the moment, when you access a job page, you will see the Edit link and that’s bad. Let’s remove it from the show.html.twig file:
<div style="padding: 20px 0">
    <a href="{{ path('ibw_job_edit', { 'token': entity.token }) }}">
        Edit
    </a>
</div>
Job Activation and Publication
In the previous section, there is a link to publish the job. The link needs to be changed to point to a new publish action. For this we will create new route:
# ...

ibw_job_publish:
    pattern:  /{token}/publish
    defaults: { _controller: "IbwJobeetBundle:Job:publish" }
    requirements: { _method: post }
We can now change the link of the Publish link (we will use a form here, like when deleting a job, so we will have a POST request):
<!-- ... -->

{% if not job.isActivated %}
    <li><a href="{{ path('ibw_job_edit', { 'token': job.token }) }}">Edit</a></li>
    <li>
        <form action="{{ path('ibw_job_publish', { 'token': job.token }) }}" method="post">
            {{ form_widget(publish_form) }}
            <button type="submit">Publish</button>
        </form>
    </li>
{% endif %}

<!-- ... -->
The last step is to create the publish action, the publish form and to edit the preview action to send the publish form to the template:
// ...

public function previewAction($token)
{
    // ...

    $deleteForm = $this->createDeleteForm($entity->getToken());
    $publishForm = $this->createPublishForm($entity->getToken());

    return $this->render('IbwJobeetBundle:Job:show.html.twig', array(
        'entity'      => $entity,
        'delete_form' => $deleteForm->createView(),
        'publish_form' => $publishForm->createView(),
    ));
}

public function publishAction(Request $request, $token)
{
    $form = $this->createPublishForm($token);
    $form->bind($request);

    if ($form->isValid()) {
        $em = $this->getDoctrine()->getManager();
        $entity = $em->getRepository('IbwJobeetBundle:Job')->findOneByToken($token);

        if (!$entity) {
            throw $this->createNotFoundException('Unable to find Job entity.');
        }

        $entity->publish();
        $em->persist($entity);
        $em->flush();

        $this->get('session')->getFlashBag()->add('notice', 'Your job is now online for 30 days.');
    }

    return $this->redirect($this->generateUrl('ibw_job_preview', array(
        'company' => $entity->getCompanySlug(),
        'location' => $entity->getLocationSlug(),
        'token' => $entity->getToken(),
        'position' => $entity->getPositionSlug()
    )));
}

private function createPublishForm($token)
{
    return $this->createFormBuilder(array('token' => $token))
        ->add('token', 'hidden')
        ->getForm()
    ;
}

// ...
The publishAction() method uses a new publish() method that can be defined as follows:
// ...

public function publish()
{
    $this->setIsActivated(true);
}

// ...
You can now test the new publish feature in your browser.
But we still have something to fix. The non-activated jobs must not be accessible, which means that they must not show up on the Jobeet homepage, and must not be accessible by their URL. We need to edit the JobRepository methods to add this requirement:
namespace IbwJobeetBundleRepository;
use DoctrineORMEntityRepository;

class JobRepository extends EntityRepository
{
    public function getActiveJobs($category_id = null, $max = null, $offset = null)
    {
        $qb = $this->createQueryBuilder('j')
            ->where('j.expires_at > :date')
            ->setParameter('date', date('Y-m-d H:i:s', time()))
            ->andWhere('j.is_activated = :activated')
            ->setParameter('activated', 1)
            ->orderBy('j.expires_at', 'DESC');

        if($max) {
            $qb->setMaxResults($max);
        }

        if($offset) {
            $qb->setFirstResult($offset);
        }

        if($category_id) {
            $qb->andWhere('j.category = :category_id')
                ->setParameter('category_id', $category_id);
        }

        $query = $qb->getQuery();

        return $query->getResult();
    }

    public function countActiveJobs($category_id = null)
    {
        $qb = $this->createQueryBuilder('j')
            ->select('count(j.id)')
            ->where('j.expires_at > :date')
            ->setParameter('date', date('Y-m-d H:i:s', time()))
            ->andWhere('j.is_activated = :activated')
            ->setParameter('activated', 1);

        if($category_id) {
            $qb->andWhere('j.category = :category_id')
                ->setParameter('category_id', $category_id);
        }

        $query = $qb->getQuery();

        return $query->getSingleScalarResult();
    }

    public function getActiveJob($id)
    {
        $query = $this->createQueryBuilder('j')
            ->where('j.id = :id')
            ->setParameter('id', $id)
            ->andWhere('j.expires_at > :date')
            ->setParameter('date', date('Y-m-d H:i:s', time()))
            ->andWhere('j.is_activated = :activated')
            ->setParameter('activated', 1)
            ->setMaxResults(1)
            ->getQuery();

        try {
            $job = $query->getSingleResult();
        } catch (DoctrineOrmNoResultException $e) {
        $job = null;
          }

        return $job;
    }
}
The same for CategoryRepository getWithJobs() method:
namespace IbwJobeetBundleRepository;
use DoctrineORMEntityRepository;

class CategoryRepository extends EntityRepository
{
    public function getWithJobs()
    {
        $query = $this->getEntityManager()
            ->createQuery('SELECT c FROM IbwJobeetBundle:Category c LEFT JOIN c.jobs j WHERE j.expires_at > :date AND j.is_activated = :activated')
            ->setParameter('date', date('Y-m-d H:i:s', time()))
            ->setParameter('activated', 1);

        return $query->getResult();
    }
}
That’s all. You can test it now in your browser. All non-activated jobs have disappeared from the homepage; even if you know their URLs, they are not accessible anymore. They are, however, accessible if one knows the job’s token URL. In that case, the job preview will show up with the admin bar.

This work is licensed under a Creative Commons Attribution-ShareAlike 3.0 Unported License.