
Android vs. iOS App Development: A Comparison & Decision Guide [Infographic]
There’s a revolution in mobile app development happening right now with the number of apps available for download in major app stores being at an all-time high. App developers are burying themselves in work, creating the latest software applications for mobile devices and hoping that their creations make enough money for them at Apple’s App Store and the Google Play Store. Apparently, the numbers are more than encouraging.
As of March 2017, the App Store had slightly more apps available at 2.2 billion compared with Play Store’s 2.8 million apps. Also in Q1 2017, combined iOS and Android app downloads were up 15% year-over-year, reaching a total of about 25 billion new downloads globally.
With re-installs, these numbers could go much higher. In terms of in-app purchases, revenue likewise increased 45% year-over-year for a staggering $15 billion across the iOS and Android systems running worldwide.
It’s definitely a good time for mobile app companies to continue hiring app developers to work on a wide array of mobile app products—from mobile music apps to instant messaging and mobile game apps. These apps are forecast to generate close to $200 billion in in-app and in-advertising revenues in less than three years’ time. But the question is, should you develop Android or iOS apps?
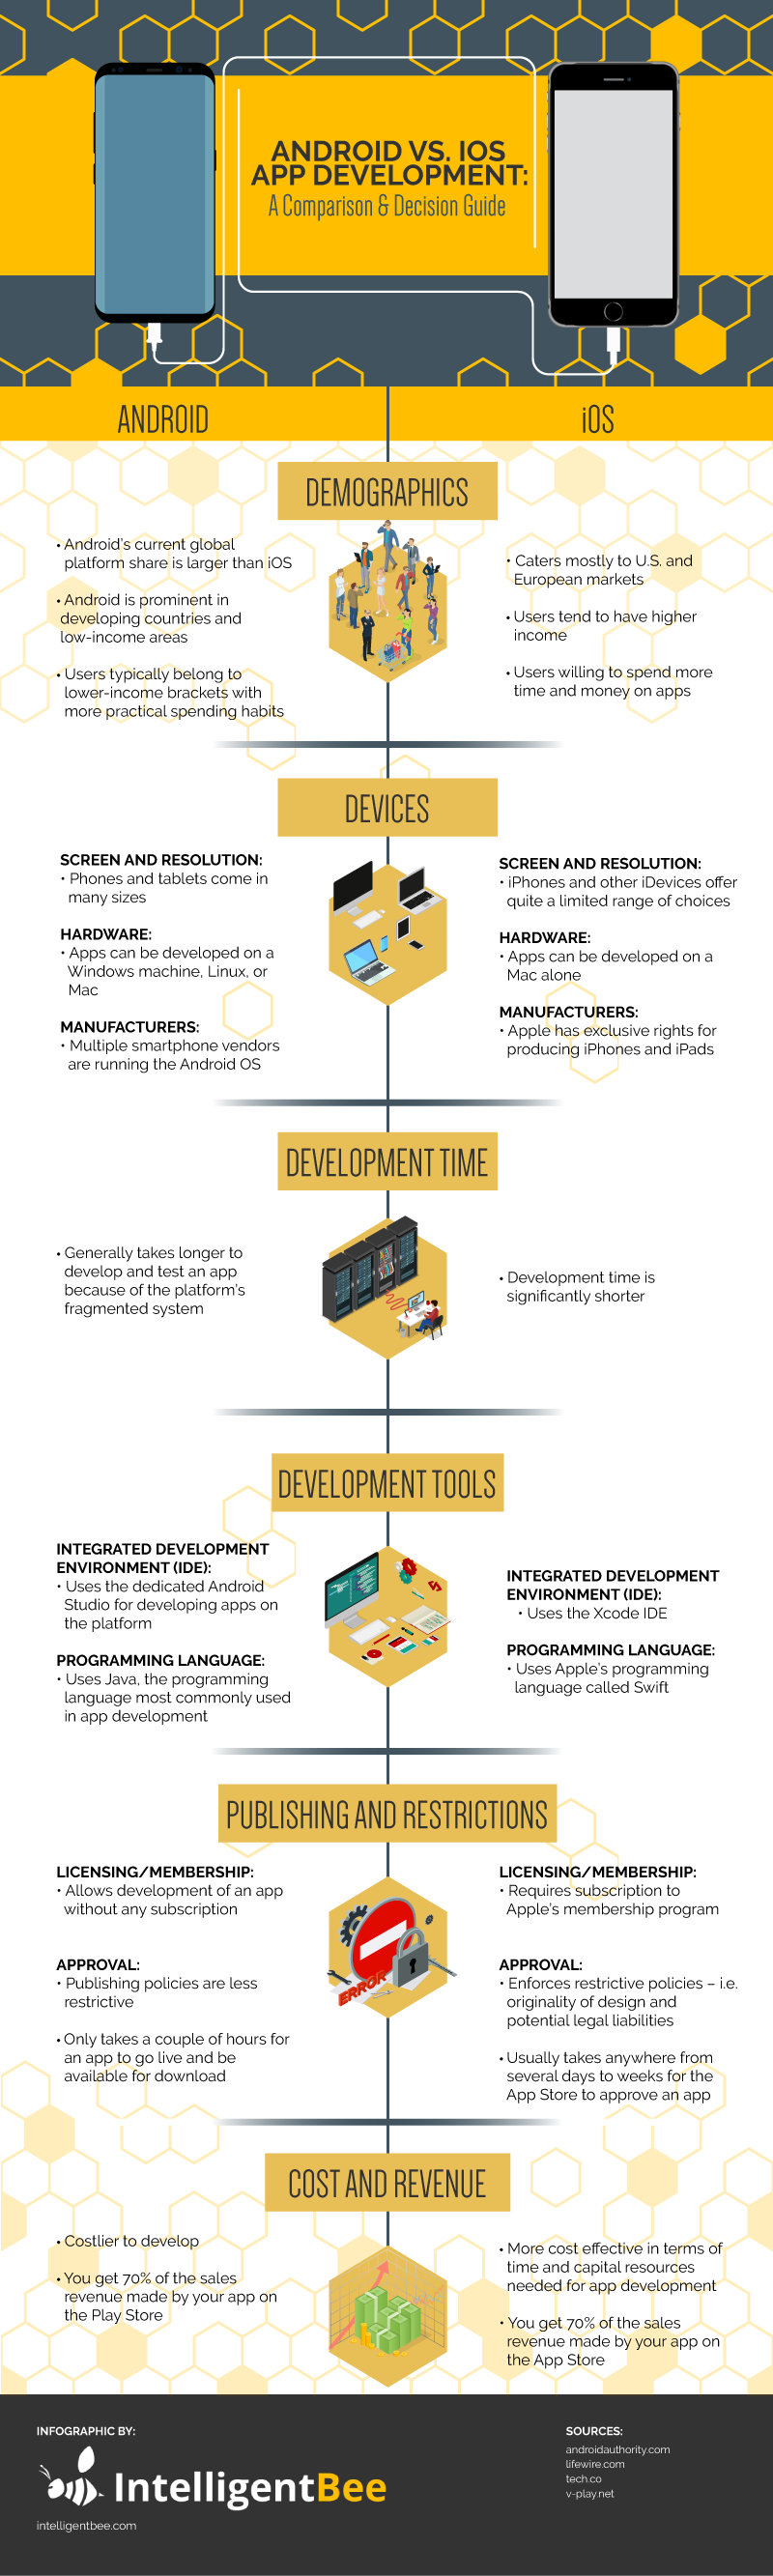
The following infographic gives you a comprehensive comparison between Android and iOS app development services in terms of demographics, the range of devices, time frame of development, hardware, publishing and restrictions, cost, and revenue. These are the factors you will need to consider as you decide whether to develop on the Android or iOS platform.
Share this Image On Your Site
The Android and iOS platforms both provide a venue for your mobile app development, but they have very distinct functionalities on their own. Sometimes, you get a clear-cut distinction between the two. However, there are also areas where they go neck and neck so you’ll have to rely on your judgment and preference when choosing the appropriate platform to develop your ware.
Demographics
Market share-wise, Android has a greater reach than its competitor, although iOS users’ income levels and spending capabilities may balance things out in the overall picture.
Devices
Screen and Resolution
The operating systems of Android and iOS differ from one another to a great extent. In designing your app, you need to factor in how your app will run given a particular device’s screen and resolution, the hardware compatible with the platform, and the individual features and capabilities of various phone models.
It might be a little more challenging to develop apps on the Android platform since you’ll be designing for different screen sizes and resolution. Meanwhile, iOS has a more uniform size range so that may free you up from having too many considerations to worry about.
Manufacturers
With Android, you’re developing not only for one Android-based device but thousands of other devices produced by different vendors. Since Android has an open nature system, you can leverage it to run your apps not just on mobile phones but also on smart TVs, wearables, or media streaming devices.
Since different Android devices have different capabilities that are unique from one another, your apps should be designed to allow compatibility with all Android devices. You have to consider the whole Android family—from low-range to mid- and high-range iterations when developing and designing your apps. Otherwise, you might be leaving out a large portion of the Android market from running your apps.
On the other hand, developing your apps for iOS means you’ll have fewer configurations to make, as you only have a limited lineup of gadgets at your disposal. This also means you’ll have fewer fragmentation issues developing your apps within the iOS system.
Development Time
As a developer, you’re naturally concerned about how much time it will take you to develop your app and put it on the App Store or the Play Store. Spending more time on app development may cause a dent on your resources and your chance to generate revenue for the company.
Testing your app across Android’s wide range of devices will naturally require more time as you look for and fix issues on one device after another. If the app works well on one Android device but not on another, you have to make the necessary modifications to the app.
Development Tools
Integrated Development Environment (IDE):
Android Studio replaced Eclipse, the previous iteration of Android’s IDE. Although Android Studio has been padded with improvements, iOS’s Xcode is deemed more mature. Specifically, in terms of debugging capability, the mobile simulator, which you use to build a prototype of your app for mobile, of iOS is deemed better than that of the Android simulator. However, Android Studio makes up for this by having a better autocomplete functionality for your coding work.
Programming Language
Java and Swift have a fairly similar structure. What differentiates them is that the former may be a bit complex if you’re just beginning to code, while the latter is based on Objective-C and touted to be generally error-free.
Publishing and Restrictions
From membership application all the way to submitting and publishing an app, it would seem like you’ll have to do a look-for-a-needle-in-the-haystack sort of thing with iOS apps, with no certainty whether your app will get approved on the App Store. In contrast, you can readily publish your app on the Play Store just by signing up and uploading your APK.
The strict quality standards of iOS may benefit users on the one hand but may scare freelance developers off on the other. That said, you’re more likely to have a better experience with Android’s mobile development policies, especially if you’re a startup developer and you’re not willing to spend on annual fees.
Cost and Revenue
Both the Play Store and the App Store put developers on equal footing when it comes to revenue generation, but the interplay of cost and revenue seems to favor iOS more. This may be attributed to iOS users’ willingness to spend on app purchases. Thus, iOS would seem to be the better choice over Android cost- and revenue-wise since it’s faster and less complicated to develop on the iOS platform.
Apple devices are known to be of premium quality and work well with a wide range of peripherals. These factors make the iOS platform effective for mobile app development as you need a shorter time to design, test, and release your app.
And the Winner Is?
After pitting Android and iOS against each other, both fared fairly the same.
Android may be your go-to platform in terms of compatibility with any hardware, more lenient rules for membership and approval of apps, and affordability of publishing fees. On the other hand, iOS shows better mileage in terms of uniformity in the screen size and resolution of devices for which the apps are intended, a more streamlined interface, shorter time frame of development, and cost and revenue model.
It’s a draw between Android and iOS when you consider market demographics, IDE features, and the nature of programming language used.
With all things considered, no one can claim to be better than the other. What one lacks, the other compensates for in another area of app development. It’s really your own choice to make, depending on your business goals and availability of resources.

How to Setup Docker for Your Symfony Project
As you probably know, I am a big Symfony fan :) In the last few years I used Vagrant to set up my Symfony development environment more or less as described here. But we now have Docker and it’s time to move forward with a new setup. Docker containers are generally more lightweight than Vagrant virtual machines, so starting and stopping them is extremely fast. They also take a lot less disk space.
To setup a Docker container you need a Dockerfile file and to combine several containers we use the docker-compose.yml file. For our environment we will need two containers, one with the latest Ubuntu LTS to host the web server and our project files and one for MySQL.
The first container is defined in the Dockerfile file as below:
FROM ubuntu:16.04
ADD . /app
RUN apt-get update
RUN apt-get install -y php apache2 libapache2-mod-php7.0 php-mysql php-intl git git-core curl php-curl php-xml composer zip unzip php-zip
# Configure Apache
RUN rm -rf /var/www/* \
    && a2enmod rewrite \
    && echo "ServerName localhost" >> /etc/apache2/apache2.conf
ADD vhost.conf /etc/apache2/sites-available/000-default.conf
# Install Symfony
RUN mkdir -p /usr/local/bin
RUN curl -LsS https://symfony.com/installer -o /usr/local/bin/symfony
RUN chmod a+x /usr/local/bin/symfony
# Add main start script for when image launches
ADD run.sh /run.sh
RUN chmod 0755 /run.sh
WORKDIR /app
EXPOSE 80
CMD ["/run.sh"]
Add this file in a new folder. We also need the vhost.conf and run.sh files used in the code from above.
The vhost.conf file is used to configure the apache virtual host:
<VirtualHost *:80>
    ServerName localhost
    DocumentRoot /app/my_project/web
    <Directory /app/my_project/web>
        Options -Indexes
        AllowOverride All
        Require all granted
    </Directory>
</VirtualHost>
The run.sh file runs when the container starts and just makes sure that the cache and logs folders are set up before launching the apache web server:
#!/bin/bash
mkdir -p my_project/app/cache my_project/app/logs
touch my_project/app/logs/prod.log
touch my_project/app/logs/dev.log
chgrp -R www-data .
chmod -R g+w my_project/app/cache my_project/app/logs
source /etc/apache2/envvars
tail -F /var/log/apache2/* my_project/app/logs/prod.log my_project/app/logs/dev.log &
exec apache2 -D FOREGROUND
That’s all for our main Ubuntu container, we now need to create the docker-compose.yml file:
version: "2"
services:
    mysql:
        image: mysql:5.7
        container_name: mysqldb
        ports:
            - "4000:3306"
        expose:
            - "3306"
        environment:
            MYSQL_ROOT_PASSWORD: yourrootpassword
    site:
        build: .
        container_name: myproject
        ports:
            - "8080:80"
        expose:
            - "80"
        depends_on:
            - mysql
        volumes:
          - .:/app
This will tell Docker to first start an MySQL 5.7 container, then our Ubuntu container that will be able to access the MySQL container using the mysql host name.
Start everything with the docker-compose up command.
When it’s done, open a new terminal (let the latest docker compose command run, do not stop it) and use the docker ps command to see the running containers:
![]()
Now, you can take the id of the Ubuntu container and ssh into it:
docker exec -t -i [ID] bash
Here you will start a new Symfony project as always (you will have to delete the my_project folder created by Docker first):
rm -rf my_project
symfony new my_project 2.8
If you name you project something else (yes, you will probably do that) just replace the all my_folder occurrences in the files and commands above with the actual name of your project.
After you created the new Symfony project, it is better to rebuild the Docker containers so the setup of the cache and logs folders will be as intended. In the terminal window where you launched Docker, press Ctrl+C to stop it then run docker-compose up again.
That’s it! You can now access your new Symfony project using the following URL: http://localhost:8080/. To connect to MySQL you will use the mysql host name:
parameters:
    database_host: mysql
    database_port: null
    database_name: symfony
    database_user: root
    database_password: yourrootpassword
Thank you! Please let me know in the comments if you have any suggestions to improve this setup or problems running it.
Using Negroni middleware in Golang for specific routes with httprouter
In the last days I’ve played a little bit with negroni middleware and httprouter router. I found that the documentation about how can we use negroni middlewares for specific routes with httprouter is pretty poor. So I decided to write this article to share with you what I’ve found.
Negroni is an idiomatic approach to web middleware in Golang which will help you build and stack middleware very easily. It comes with some default middlewares like:
- negroni.Recovery - Panic Recovery Middleware.
- negroni.Logger - Request/Response Logger Middleware.
- negroni.Static - Static File serving under the "public" directory.
But it also letting you create your own middlewares very easily:
func MyMiddleware(rw http.ResponseWriter, r *http.Request, next http.HandlerFunc) {
    // do some stuff before
    next(rw, r)
    // do some stuff after
}

…
n := negroni.New()
n.Use(negroni.HandlerFunc(MyMiddleware))
Negroni is BYOR (Bring your own Router) so we can use it with httprouter.
Httprouter is a Golang lightweight and high performance HTTP request router which is fast and has low memory consumption. TLDR: it is one of the fastest routers.
Here you have an example on how a simple route can be added when using httprouter:
router := httprouter.New()
router.POST("/login", loginHandler)
Where loginHandler will look like:
func loginHandler(w http.ResponseWriter, r *http.Request, params httprouter.Params) {
    // login controller logic
}
Now lets suppose you want to access GET profile endpoint but you need to be authenticated.
We will start by creating an authentication middleware:
// auth middleware
func auth(rw http.ResponseWriter, r *http.Request, next http.HandlerFunc) {
    // do some stuff before
    log.Println("auth middleware -> before executing controller")

    // call endpoint handler
    next(rw, r)

    // do some stuff after
    log.Println("auth middleware -> after the controller was executed")
}
Then we will create a handler which will return profile information after the authentication will be done. This handler will be sent to the auth middleware as a callback using "next" parameter:
func profileHandler(w http.ResponseWriter, r *http.Request) {
    fmt.Fprintf(w, "This is the content of the profile controller\n")
    log.Println("executing profile controller")
}
Now let’s send everything to the router:
nProfile := negroni.New()
// set the middleware
nProfile.Use(negroni.HandlerFunc(auth))
// set the handler
nProfile.UseHandlerFunc(profileHandler)
// attach negroni middleware and handler to our route
router.Handler("GET", "/profile", nProfile)
That was simple, but now if we have a route which contains parameters inside it (like /hello/:name) we cannot access it from our handler function. To solve that, I’ve written the following functions which will help us call the handler with the parameters:
// callwithParams function is helping us to call controller from middleware having access to URL params
func callWithParams(router *httprouter.Router, handler func(w http.ResponseWriter, r *http.Request, ps httprouter.Params)) func(w http.ResponseWriter, r *http.Request) {
    return func(w http.ResponseWriter, r *http.Request) {
        params := getUrlParams(router, r)
        handler(w, r, params)
    }
}

// getUrlParams function is extracting URL parameters
func getUrlParams(router *httprouter.Router, req *http.Request) httprouter.Params {
    _, params, _ := router.Lookup(req.Method, req.URL.Path)

    return params
}
And will be used like this:
router := httprouter.New()
nHello := negroni.New()
// add auth middleware
nHello.Use(negroni.HandlerFunc(auth))
// add handler using callWithParams function so we can access the URL parameters in handler
nHello.UseHandlerFunc(callWithParams(router, helloHandler))
router.Handler("GET", "/hello/:name", nHello)

n.UseHandler(router)

log.Fatal(http.ListenAndServe(":8080", n))
The full working example can be found here.
Mysqldump Through a HTTP Request with Golang
So, in a previous post I explained how one can backup all databases on a server, each in its own dump file. Let's take it to the next level and make a Golang program that will let us run the dump process with a HTTP request.
Assuming you already have Go installed on the backup server, create first a project directory in your home folder for example. Copy the mysql dump script from here and save it as dump.sh in your project folder. Modify ROOTDIR="/backup/mysql/" inside dump.sh to reflect current project directory.
We will create a Golang script with two functions. One will launch the backup script when a specific HTTP request is done. The other one will put the HTTP call behind a authentication, so only people with credentials will be able to make the backup request.
package main

import (
	"encoding/base64"
	"fmt"
	"log"
	"net/http"
	"os"
	"os/exec"
	"strings"
)

var username = os.Getenv("DB_BACKUP_USER")
var password = os.Getenv("DB_BACKUP_PASSWORD")

func BasicAuth(w http.ResponseWriter, r *http.Request, user, pass string) bool {
	s := strings.SplitN(r.Header.Get("Authorization"), " ", 2)
	if len(s) != 2 {
		return false
	}
	b, err := base64.StdEncoding.DecodeString(s[1])
	if err != nil {
		return false
	}
	pair := strings.SplitN(string(b), ":", 2)
	if len(pair) != 2 {
		return false
	}
	return pair[0] == string(user) && pair[1] == string(pass)
}
func handler(w http.ResponseWriter, r *http.Request) {
	if BasicAuth(w, r, username, password) {
		cmd := exec.Command("bash", "dump.sh")
		stdout, err := cmd.Output()
		if err != nil {
			log.Fatal(err)
		}
		fmt.Fprintf(w, string(stdout))
		return
	}
	w.Header().Set("WWW-Authenticate", `Basic realm="Protected Page!!! "`)
	w.WriteHeader(401)
	w.Write([]byte("401 Unauthorized\n"))
}

func main() {
	http.HandleFunc("/backup", handler)
	http.ListenAndServe(":8080", nil)
}
This uses DB_BACKUP_USER and DB_BACKUP_PASSWORD that you will have to set as environment variables. Just append this to your ~/.bashrc file
export DB_BACKUP_USER="hello"
export DB_BACKUP_PASSWORD="password"
Now run source ~/.bashrc to load them.
Build the executable with go build http-db-backup.go where http-db-backup.go is the name of your Go file. Now you need to run the executable with sudo, but while preserving the environment: sudo -E ./http-db-backup
Now if you open your browser and open http://111.222.333.444:8080/backup (where 111.222.333.444 is your backup machine IP) the backup process will start, and you will get the output of the dump.sh in your browser when backup finishes.
We can furthermore add another function to list the directory in browser, so you can download the needed backup or backups.
func lister(w http.ResponseWriter, r *http.Request) {
	if BasicAuth(w, r, username, password) {
		http.FileServer(http.Dir(".")).ServeHTTP(w, r)
		return
	}
	w.Header().Set("WWW-Authenticate", `Basic realm="Protected Page!!! "`)
	w.WriteHeader(401)
	w.Write([]byte("401 Unauthorized\n"))
}
All you need to do is to add http.HandleFunc("/", lister) to your main() and navigate to http://111.222.333.444:8080/ . You will be able to navigate the backup directory to download the dump files.

Best Solutions to Top Mobile App Development Challenges
More than half of the world’s population now uses a smartphone. As the price of data plans continue to decrease all over the world, web traffic coming from mobile devices increases year by year. In fact, more than half of today’s global internet traffic comes from mobile devices.
People are spending more time on their mobile devices, thereby increasing the demand for mobile apps. Recent statistics show that 52% of the time individuals spend on digital media is on mobile apps. In 2016, global mobile app revenues amounted to 88.3 billion U.S. dollars, and it’s forecasted that by 2020, global mobile app revenues from app stores and in-app advertising will reach 188.9 billion U.S. dollars.
Indeed, mobile app development is a lucrative business, given the mobile and digital revolution.
But, for every venture comes a challenge. It’s important to know the potential challenges you may face and how to address them before hiring an app developer.

Tight Market Competition
The app market is overcrowded, and it’s becoming a challenge for a mobile application to get noticed. Apple’s App Store has over 2.2 billion apps and Google’s Play Store has over 2.8 million apps as of March 2017. That doesn’t even include the apps in Windows Phone Store and BlackBerry App World.
Solution! Define your target market and the main goal of the app. These two details are fundamental to the overall design, UI, and UX of your mobile app.
Make sure to do your market research to study the apps that already offer similar functionality. Determine your unique selling point, and make sure that your app features a beautiful design and an easy-to-use interface.
Funding
So, you’ve already come up with a solid app idea, and you’re sure that it’s going to be a hit. It’s time to get the funding to get it built.
Mobile app development can be costly, depending on the design, function, and interface of the app. Prepare the funding before you hire an app developer to avoid delays in the launch. You should also take into consideration the cost of marketing your new app.
Solution! If you can’t personally fund your mobile app idea, there are many ways to get funding. You can try crowdfunding websites like GoFundMe, Kickstarter, AppBackr, and the like. You can also ask your relatives or friends to partner up with you. If you want your mobile app to be a solo venture, then you can try for a bank loan or personal loan from people in your social circle.

Screen Size and Device Compatibility
Users have a wide variety of devices that run on different screen sizes, operating systems and platforms. Make sure that your mobile app developer understands the importance of a responsive design. Your mobile app should work for devices of all screen sizes, from the smallest smartphone to the largest tablet computer.
Solution! OS is another aspect to consider. iOS, Android and Windows has its own UI and algorithms. Be prepared to encounter bugs and errors along the way. For this reason, it’s highly recommended to release a beta version.
Interactive UI and User-Friendliness
Poor user experience is one of the top reasons why a lot of mobile apps don’t succeed simply because it turns off users. Your mobile app must be easy to use and understand. It doesn’t need to have a wide plethora of unnecessary features.
Solution! Include a tutorial that users can go back to within the app itself. Also, mobile devices nowadays include high-tech sensors and hardware that offers a range of opportunities for creating an interactive app. Explore the possibilities, but stay true to the goal and function of your mobile app.

Development Approach
There are numerous app development approaches that you can utilize, such as hybrid app development, cross-platform, native app development, or platform specific native app development. Also, you don’t want to waste time and additional resources in developing an app that wouldn’t work for multiple devices and platforms.
Solution! Strategize and decide on the tools and frameworks to use according to the UI and UX needs of your app. Platforms like OpenSourceSDK offers the ability to develop apps using C/C++ or HTML5. It also allows developers to incorporate single API across multiple platforms. Then, there are cross-platform developer tools that you can leverage for your mobile app venture, such as RhoMobile, PhoneGap, Appcelerator, Mosync, and WidgetPad.
Managing Mobile Content
Content is the life of a mobile app. Today’s mobile users demand rich content, image, and animation. However, you need to consider internet speed and bandwidth. Oftentimes, wireless network connection contributes to the failed delivery of mobile app content. As a result, users find it too bothersome to use mobile apps that don’t load quickly.
Solution! Choose a mobile content management system that simplifies content and optimizes bandwidth, such as AirWatch, Alfresco, and MobileIron. These tools can help you deliver rich content reliably.

Balancing Performance and Battery Life
It’s a big challenge to design a well-performing and bug-free app that contains rich media yet doesn’t consume too much battery life. Pokemon Go, for instance, is a great game with rich AR graphics and features. Users were hooked the moment they downloaded the app. But, most users are complaining that the game drains their smartphone quickly. Graphics, animation, content, and function should not compromise battery consumption.
Solution! Run tests to monitor the performance of your app.
Marketing and Promotion
Your mobile app is now among the millions of apps listed in the Apple’s App Store or Google’s Play Store. How do users find it? Branding, marketing and promotions play a huge role in the success of your mobile app.
Solution! Platforms like AppTamin, AppScend , MobileDevHQ, and Smore can help you market your mobile apps. You can also take to social media advertisements to get the word out there. Create a data-driven strategy and consult with marketing professionals about how you can get your target market to download the new app.
It’s true that mobile apps are popping up like mushrooms in app stores. But, mobile app development isn’t as easy as 1, 2, 3, launch! There are challenges that beset creators and developers. Fortunately, these challenges can be overcome with careful planning.
Introduction to iBeacons on iOS
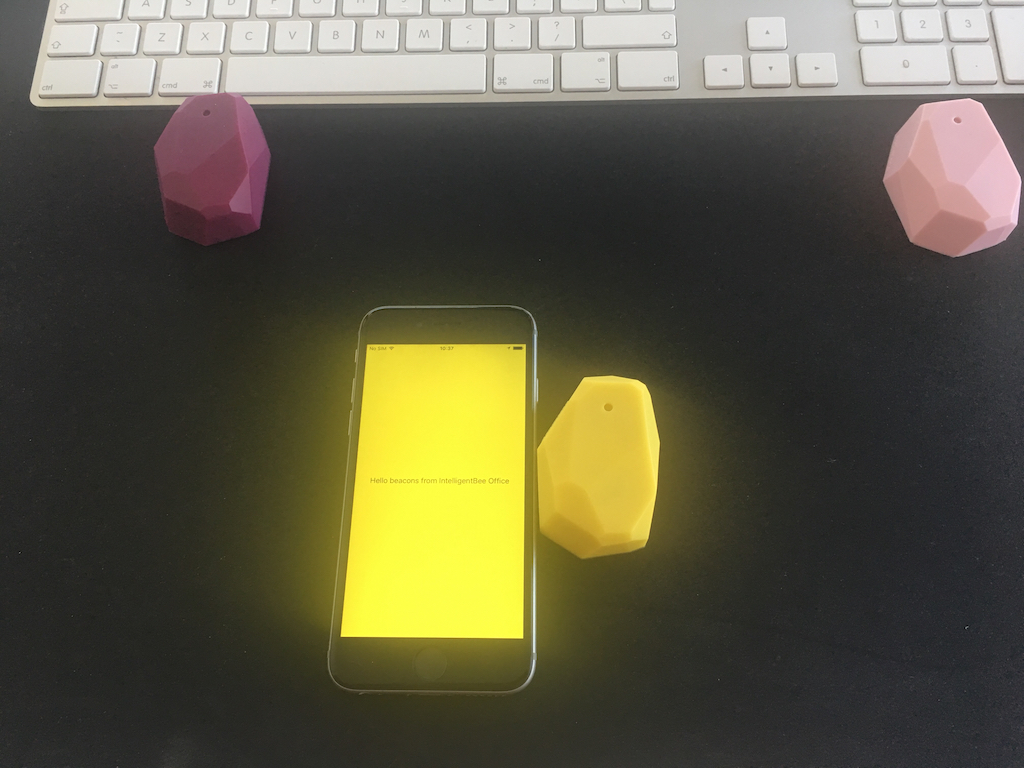
Hello, I got my hands on some interesting devices from Estimote called iBeacons which they are used for sending signals to the users (iOS/ Android) phone using Bluetooth.
What I’m going to do next is to build an iOS app using these devices which changes the background color accordingly to the nearest one of these 3 beacons.
![]()
The first thing that you have to do after you create a new project from XCode of Single View Application type is to install ‘EstimoteSDK’ using Cocoa pods. If you don’t have Cocoapods installed on your Mac please do it by following the instructions from here.
From the terminal window use "cd" to navigate into your project directory and run "pod init". This will create a podfile in your project directory. Open it and under "# Pods for your project name" add the following line:
pod 'EstimoteSDK'
Then run "pod install" command in your terminal. After the installation of the cocoapod close the project and open the .workspace file and create a bridging header. Import there the EstimoteSDK with the code below.
#import <EstimoteSDK/EstimoteSDK.h>
Now let’s continue by creating a ‘iBeaconViewController’ with a UILabel inside of it having full width and height and the text aligned center, after this please create an IBOutlet to it and name it 'label' . Then set the new created view controller as the root view for the window.
 func application(_ application: UIApplication, didFinishLaunchingWithOptions launchOptions: [UIApplicationLaunchOptionsKey: Any]?) -> Bool {
        // Override point for customization after application launch.

        window?.rootViewController = UIBeaconViewController(nibName: String(describing: UIBeaconViewController.self), bundle: nil)

        return true
    }
The next step is creating the ‘BeaconManager’< file, you have it’s content below.
import UIKit

enum MyBeacon: String {

    case pink = "4045"
    case magenta = "20372"
    case yellow = "22270"
}

let BeaconsUUID: String = "B9407F30-F5F8-466E-AFF9-25556B57FE6D"
let RegionIdentifier: String  = "IntelligentBee Office"
let BeaconsMajorID: UInt16  = 11111

class BeaconManager: ESTBeaconManager {

    static let main : BeaconManager = BeaconManager()

}
But let’s first explain what is the purpose of each item in this file. So an iBeacon contains the following main properties, an UUID, MajorID, MinorID. All of these properties represents a way for the phone to know which device should listen to.
The MajorID is used when having groups of beacons and the MinorID is to know each specific device, the minor ids are represented in the MyBeacon enum among with the beacon color. The RegionIdentifier represents a way for the app to know what region are the beacons part of and it’s used to differentiate all the regions that are monitored by the app.
Now let’s go back on the UIBeaconViewController and start writing some action.
import UIKit

class UIBeaconViewController: UIViewController, ESTBeaconManagerDelegate {

    // MARK: - Props

    let region = CLBeaconRegion(
        proximityUUID: UUID(uuidString: BeaconsUUID)!,
        major: BeaconsMajorID, identifier: RegionIdentifier)

    let colors: [MyBeacon : UIColor] =
        [MyBeacon.pink: UIColor(red: 240/255.0, green: 183/255.0, blue: 183/255.0, alpha: 1),
         MyBeacon.magenta : UIColor(red: 149/255.0, green: 70/255.0, blue: 91/255.0, alpha: 1),
         MyBeacon.yellow : UIColor(red: 251/255.0, green: 254/255.0, blue: 53/255.0, alpha: 1)]

    // MARK: - IBOutlets

    @IBOutlet weak var label: UILabel!
You can guess what region does, it defines a location to detect beacons, pretty intuitive. The colors is an array which contains the mapping between the minorID and the color of each beacon.
// MARK: - UI Utilities

    func resetBackgroundColor() {
        self.view.backgroundColor = UIColor.green
    }

    // MARK: - ESTBeaconManagerDelegate - Utilities

    func setupBeaconManager() {
        BeaconManager.main.delegate = self

        if (BeaconManager.main.isAuthorizedForMonitoring() && BeaconManager.main.isAuthorizedForRanging()) == false {
            BeaconManager.main.requestAlwaysAuthorization()
        }
    }

    func startMonitoring() {

        BeaconManager.main.startMonitoring(for: region)
        BeaconManager.main.startRangingBeacons(in: region)
    }
The functions above are pretty self describing from their names, one thing I need to describe is Monitoring and Ranging. The monitoring actions are triggered when the phone enters/ exits a beacons area and the ranging is based on the proximity of the beacon.
    // MARK: - ESTBeaconManagerDelegate

    func beaconManager(_ manager: Any, didChange status: CLAuthorizationStatus) {

        if status == .authorizedAlways ||
            status == .authorizedWhenInUse {
            startMonitoring()
        }
    }

    func beaconManager(_ manager: Any, monitoringDidFailFor region: CLBeaconRegion?, withError error: Error) {
        label.text = "FAIL " + (region?.proximityUUID.uuidString)!
    }

    func beaconManager(_ manager: Any, didEnter region: CLBeaconRegion) {

        label.text = "Hello beacons from \(region.identifier)"
    }

    func beaconManager(_ manager: Any, didExitRegion region: CLBeaconRegion) {

        label.text = "Bye bye beacons from \(region.identifier)"
    }

    func beaconManager(_ manager: Any, didRangeBeacons beacons: [CLBeacon], in region: CLBeaconRegion) {

        let knownBeacons = beacons.filter { (beacon) -> Bool in

            return beacon.proximity != CLProximity.unknown
        }

        if let firstBeacon = knownBeacons.first,
            let myBeacon = MyBeacon(rawValue:firstBeacon.minor.stringValue)   {

            let beaconColor = colors[myBeacon]
            self.view.backgroundColor = beaconColor
        }
        else {
            resetBackgroundColor()
        }
    }

    func beaconManager(_ manager: Any, didFailWithError error: Error) {
        label.text = "DID FAIL WITH ERROR" + error.localizedDescription
    }
}
After the insertion of all the code, the app should run with no errors or warning and should look like this:
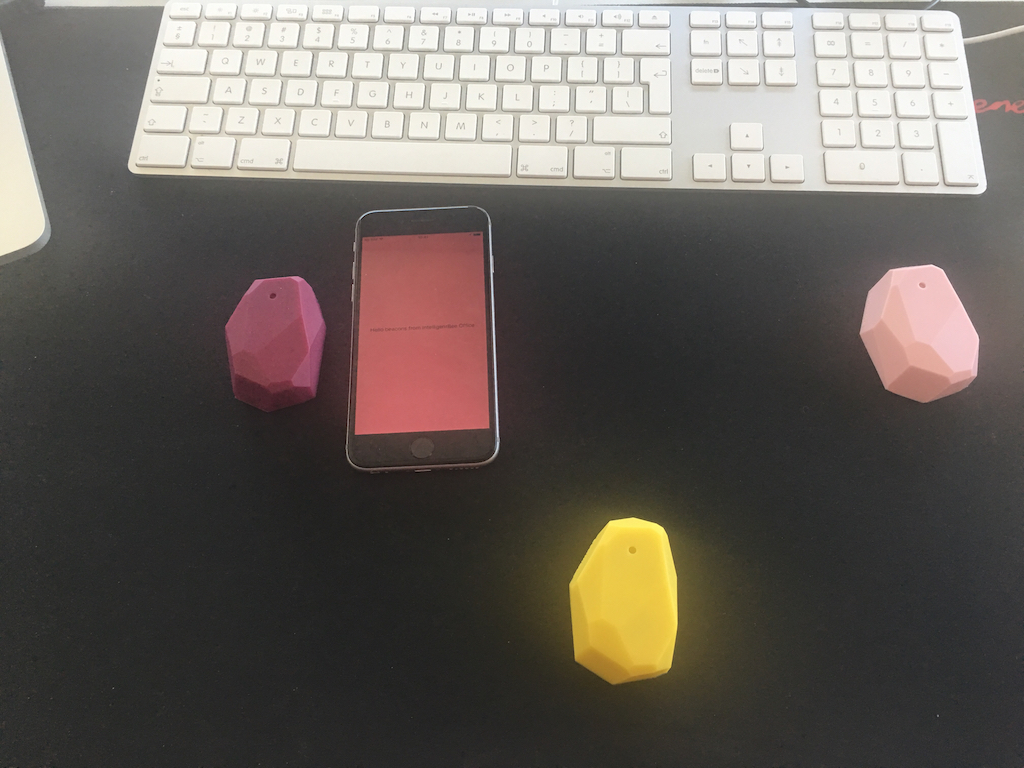
I hope this is a good introduction for iBeacons in iOS Mobile App Development. If you have any improvements or suggestions please leave a comment below.
You can get the code from here: https://github.com/intelligentbee/iBeaconTest
How to create a bridging header in iOS
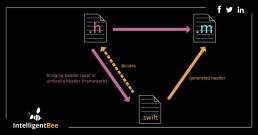
Hello ! If you want to import a Objective-C code into a Swift Xcode project you definitely have to create a bridging header (this allows you to communicate with your old Objective-C classes from your Swift classes).
The process of doing this is very easy. Go to File -> New -> File… , a window will appear in which you will select “Objective-C File” , name the file however you choose, then select Create. A pop-up will appear asking you if you want to create a bridging header like in the image bellow.
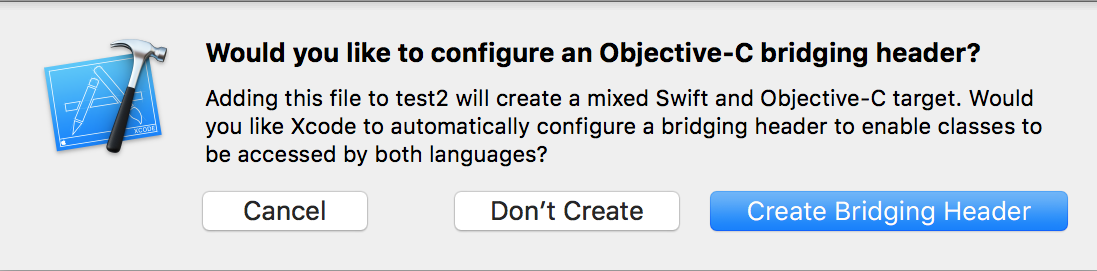
Choose “Create Bridging Header” and voila, you a have it.
To complete the process delete the .m file that you choose the name and move the bridging header to a more suitable group inside the project navigator.
Read more iOS related articles.
If you want to create this manually follow the steps from here.
That’s it, hope you find this post useful and if you have suggestions please leave a comment below.

Golang Guide: A List of Top Golang Frameworks, IDEs & Tools
Since its introduction, Google’s Go Programming Language (Golang) has been experiencing an increasing popularity among mainstream users. In a December 2016 survey, 89% of the 3,595 respondents claimed that they program in Go at work or outside of work.
Additionally, Go ranks highest among the programming languages in terms of expertise and preference. This July 2017, Go ranks 10th in Tiobe's Programming Language of the Year, jumping from its 55th ranking last year.
Clearly, Go is attracting many programmers from various disciplines and software development outsourcing professionals. And it’s safe to say that this is due to the ease of using Go.
As a compiled, open-source programming language, Go makes it easy for developers to build simple, reliable, and efficient software. It is the product of the innovation and evolution of the more conservative languages such as C and C++.
With Go, the amount of code typing is reduced and writing robust APIs without sacrificing its performance has become easier. Designed for scalability and concurrency, Go makes optimizations possible. A compiler can perform all the code inspection work before runtime.
We’ve compiled a list of the top frameworks, IDEs, and tools for Golang for your quick reference. Bookmark it on your browser so that you can come back whenever you’re working with Go!
Frameworks for Golang
Web frameworks help developers build applications as easily and quickly as possible. Go is still relatively new, so it’s important to use frameworks with sufficient documentation.
Here are 9 frameworks you can use to help you build projects using the Go Language.
1. Revel
As a high productivity framework for Go, Revel includes a Hot Code Reload tool that lets you rebuild your project on every file change. It also includes a wide variety of comprehensive and high-performance features, so you don’t need to find external libraries to integrate into the framework.

2. Beego
Beego is a full-fledged MVC framework with its own logging library, ORM, and web frameworks. You don’t need to find and install third-party libraries. It features a built-in tool called Bee Tool that watches out for code changes and runs tasks when changes are detected.
Beego will save you a lot of hours, especially in the beginning of a project when you’re figuring out the logging framework or application structure.
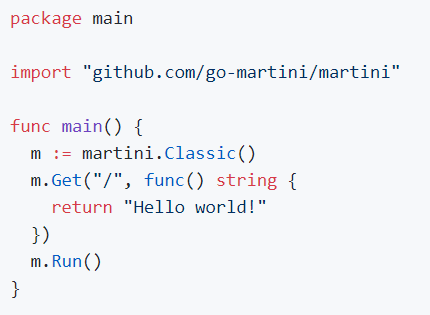
3. Martini
Inspired by Sinatra, Martini is an extremely light but powerful framework. It was developed for writing modular web applications and services in Golang.
It features a non-intrusive design that’s quick and easy to use and includes a wide range of handlers and middleware. It’s capable of performing basic routing, exception handling, and default document serving for AngularJS apps in HTML5 mode.

Martini’s best feature is its use of reflection, which lets developers dynamically insert data into the handler functions and add new services. Martini is also fully compatible with the http.HandlerFunc interface. The downside, though, is that the Martini framework is no longer maintained.
4. Gin Gonic
Gin Gonic is a web framework with a martini-like API, but with much better performance. If you’ve used Martini before, then you’ll be familiar with Gin Gonic. Otherwise, it will only take you 10 minutes to learn Gin. It’s that easy!
Gin Gonic is a minimalistic framework that includes only the most essential libraries and features. This makes it perfect for developing high-performance REST APIs. Plus, it’s 40 times faster than Martini.
You can add middleware, nested groups, JSON validation, and rendering, but it still maintains its optimum performance. Gin Gonic uses httprouter, the fastest HTTP router for Go.

5. Buffalo
Building new web applications with Go is quick and simple with Buffalo. When you’re starting a new project, Buffalo already has everything setup for you—from front-end to back-end development.
It features Hot Reloading, which means that dev command will watch your .go and .html files automatically. It will then rebuild and restart your binary for you. Just run the dev command, and you’ll see the changes go live right before your eyes!
Buffalo is more than just a framework – it’s a holistic web development eco-system that lets you get straight to building your application.
6. Goji
Goji is a lightweight and fast web framework that has composability and simplicity as its main priority. Much like net/http.ServeMux, Goji is a minimalistic HTTP request multiplexer. It includes Einhorn support, which makes it possible for you to have websocket support in Goji.
Additional features include URL patterns, re-configurable middleware stack, graceful shutdown, and more. Goji can be used in production and has served billions of requests across several organizations.

7. Tiger Tonic
Inspired by Dropwizard, Tiger Tonic is a Go framework for developing JSON web services and building high-performance REST APIs. To stay true to the principles of Golang, Tiger Tonic strives to keep features orthogonal.
The downside to Tiger Tonic is its inadequacy when it comes to building large, back-end applications.

8. Gocraft
Another powerful yet minimalistic framework, Gocraft offers fast and scalable routing performance. It adds routing to the net/http package from the standard library.
Gocraft is a Go mux and middleware package that features casting and reflection capabilities so that you can type your code statically. You can also add an optional functionality with the built-in middleware or write your own.
Since performance is always one of the top concerns for developers, Gocraft is a great choice for developers. It’s very easy to write backend web applications using the Gocraft framework.

9. Mango
Although Mango is not actively maintained by its creator, Paul Bellamy, a lot of Go users still use it. The great thing about Mango is its modularity. You can choose from a variety of libraries to include in your project.
Mango lets you build reusable modules of HTTP functionality as quickly and easily as possible. It compiles a list of middleware and application into a single http server object to keep your code self-contained.

Integrated Development Environment (IDEs) for Golang
IDEs for Golang are gaining popularity, along with the Go Language. While many developers still prefer to use text editors, many prefer to use IDEs as well.
If you’re working on a large-scale project with an extensive codebase, an IDE can help you organize your code and navigate it with ease. Furthermore, IDEs can help you test your code and edit them accordingly.
Here are the top IDEs that work great with Golang.
1. Gogland
Software development company JetBrains released another reliable IDE, but this time, for Golang. Gogland is a commercial IDE that provides a robust ergonomic environment for Go developers. It also features coding assistance, debugger, and an integrated terminal.
Because an established company created Gogland, it has an extensive IntelliJ plugin ecosystem where you can get additional tools should you need more.
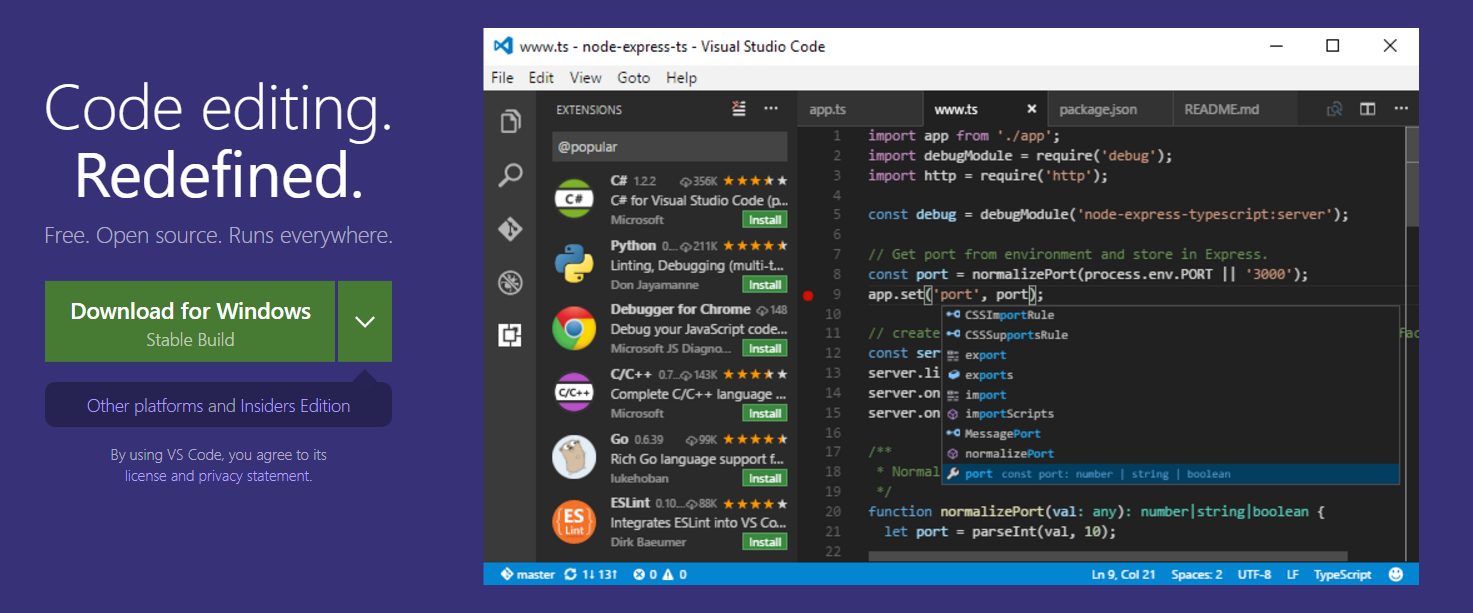
2. Visual Studio Code
Created by Microsoft, Visual Studio Code is a full-featured, open-source IDE and code editor that supports a wide variety of programming languages. It features smart completion with IntelliSense; debugging using break points, call stacks, and an interactive console; built-in Git integration; and hierarchical folder and file explorer.
As another popular IDE, Visual Studio Code has a supportive community of Go developers that regularly contribute. With Visual Studio Code, you can extend functionalities with the array of available plugins.
3. LiteIDE
LiteIDE is among the first Golang-centric, open-source IDEs that was created more than 5 years ago. As a C++ Qt application with a unique look and feel, LiteIDE offers code management, configurable build commands, gdb and Delve debugger, auto-completion and theming with WordApi, MIME type based system, and more. It also provides JSON and Golang support.

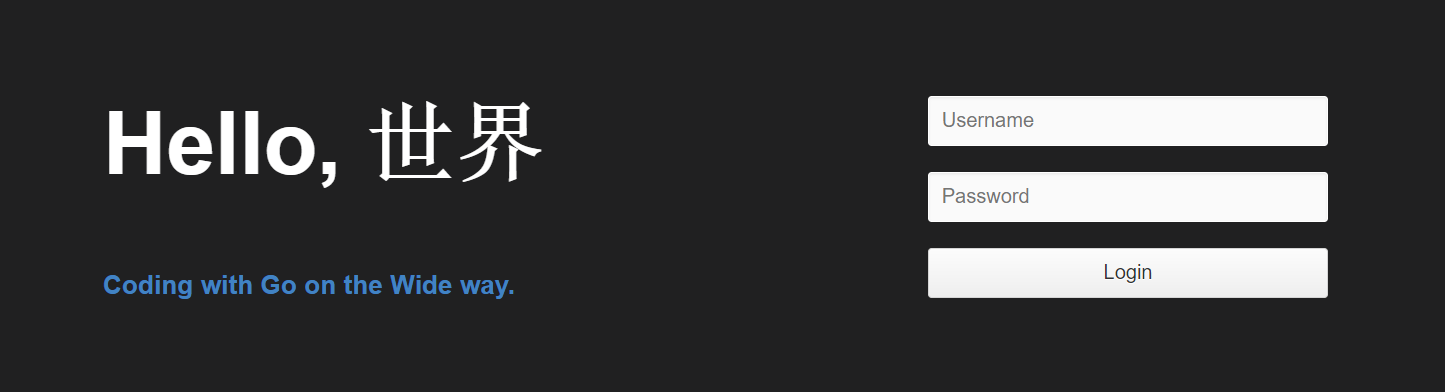
4. Wide
Wide is a web-based IDE for Golang programmers. It’s designed for collaborative development and works best for teams and web development agencies. Wide features include code highlight, debugging, Git integration, and more.
Because Wide is created and maintained by a Chinese developer, most of its documentation and support are in Chinese.
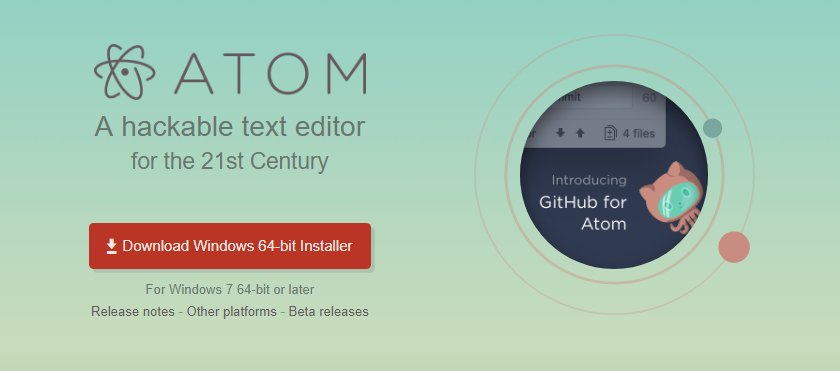
5. Atom with go-plus plugin
If you’re already using Atom, your code editing experience in Golang can be improved with an open-source package called go-plus. With go-plus, you get instant, real-time feedback on your syntax and build errors.
The go-plus package offers almost all Golang support in Atom. It can also be used for tools, build flows, linters, vet and coverage tools.
Go-plus also includes various code snippets and features such as autocomplete with gocode, code formatting with gofmt, goreturns, or goimports, and more.
6. Eclipse with GoClipse
Because Eclipse is a widely popular IDE, numerous plugins have been created for it. GoClipse is an Eclipse plugin for Golang that offers Go source code editing with configurable syntax highlighting and automatic indentation and brace completion.
GoClipse also serves as a project wizard and builder that reports syntax and build errors instantly. Additional features of GoClipse include debugging functionality and code assist.

7. Sublime Text with GoSublime
Sublime Text is another sophisticated text editor with a large community of contributors and developers. As such, a wide variety of plugins has been created for this IDE.
GoSublime is a Golang plugin for Sublime Text 3 that offers code completion from Gocode, lint/syntax check while you’re wiring code, automatic addition and removal of package imports, and more.

8. Vim with vim-go plugin
Vim is a free, open-source IDE that can be customized and configured with various plugins. If you’re a Golang programmer, you can use Vim with the vim-go plugin created by Fatih Arslan. Vim-go automatically installs all the necessary binaries for providing a smooth Vim integration for Golang.
Vim-go is a powerful plugin suite for writing and developing Go. Its features include advanced source code analysis, adding and removing import paths, multiple 3rd liner support, goto definition, quick file executions, and much more.
Vim-go is highly customizable, with individual features that can be enabled or disabled according to your need.
9. Komodo
Komodo is a full-featured Go language IDE that supports other programming languages such as Node.js, Python, Ruby, Perl, and more. With this Go IDE, you can write clean code easily. Its features include an advanced code editor, intelligent code completion, syntax checking, version control and unit testing, and a Go Code Intelligence that allows code browsing and code hinting.
The great thing about Komodo is that it works great for team collaboration since multiple developers can edit a document simultaneously. Komodo can be installed on Mac, Windows, or Linux with just one license.

10. IntelliJ IDEA with Go Language (golang.org) Support Plugin
IntelliJ IDEA (same company as JetBrains) is an IDE that can be used with Golang through the Go language support plugin. If you want to use IntelliJ IDEA with Golang, you need to install this plugin, albeit with limited features as opposed to Gogland.
Tools for Golang
Golang tools can be used for a wide variety of projects and web applications. Developers can write code and build applications as quickly and easily as possible with these helpful tools.
Here’s a list of the top Golang tools for your reference.
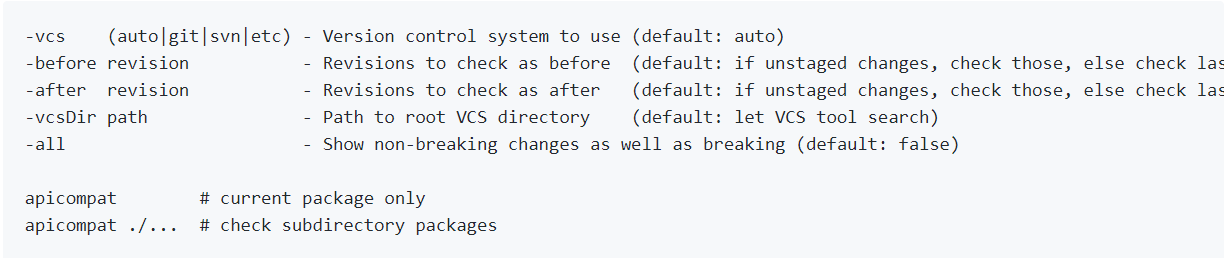
1. Apicompat
Apicompat is a new Go language tool that helps developers detect backwards, incompatible changes and exported declarations.
With Apicompat, you can avoid false positives. However, not every backwards incompatible change can be detected by Apicompat. Swapping argument parameters and other changes still need to be considered by the library author.
2. Checkstyle
Inspired by Java Checkstyle, Checkstyle for Golang prints out coding style suggestions. It also lets developers check file line/function and line/param number, which can then be configured by the user.

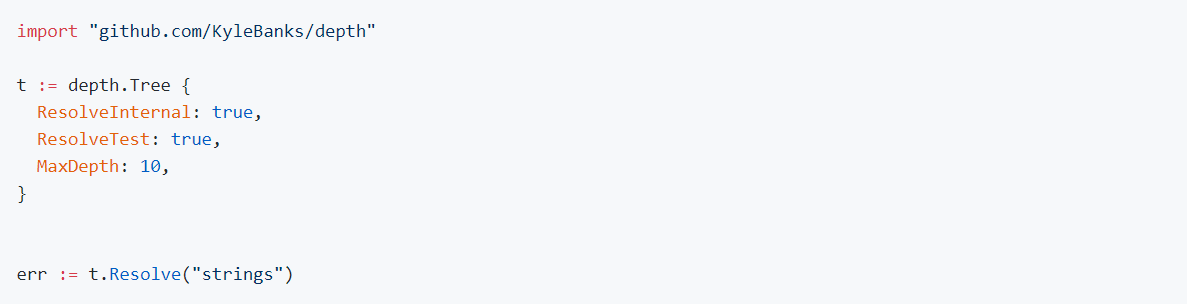
3. Depth
Depth is another useful Golang tool that helps web developers retrieve and visualize Go source code dependency trees. It can be used as a standalone command-line application or as a particular package within your own project. You can add customizations by simply setting the appropriate flags on the Tree before resolving.
4. Go-Swagger
This toolkit includes a wide variety of features and functions. Go-Swagger is an implementation of Swagger 2.0, and can serialize and deserialize swagger specifications. It’s a minimalist yet powerful representation of your RESTful API.
With Go-Swagger, you can swagger spec document, validate against jsonschema, and other extra rules. Other features include code generation, API generation based on swagger specs, spec document generation based on the code, extended string formats, and more.
5. Go Meta Linter
If you need to run Go lint tools and normalize their output concurrently, that’s exactly what Go Meta Linter can do for you. Go Meta Linter is intended to be used with a text editor or an IDE integration such as Sublime Linter plugin, Atom go-plus package, Emacs Flycheck checker, Vim/Neovim, and Go for Visual Studio Code. It also supports a wide variety of linters and configuration files like JSON.

6. Go-callvis
Go-callvis is a web development tool that allows you to visualize the call graph of your Go program with Graphviz's dot format. This tool is especially useful when building large projects with complex codebases. This is also useful when you want to understand another developer’s code structure or rebuild someone else’s project.
With go-callvis, developers can focus specific package within a program; group functions according to package and methods according to type; and limit packages to custom path prefixes, and ignore those that contain them.
7. Gonative
Gonative is a simple Golang tool that lets you build Go toolchains with native libs, which can be cross-compiled while still utilizing the Cgo-enabled versions of the stdlib packages.
Gonative downloads the binary distributions for each platform and copies their libraries into its proper places. At the same time, Gonative sets the correct mod time to avoid unnecessary rebuilds.
Unfortunately, Gonative remains untested on Windows. Additionally, there’s no Linux/arm support provided.

8. Grapes
Grapes is a lightweight Golang tool designed to distribute commands over ssh easily. It’s written and actively maintained by Yaron Sumel.
Grapes will soon support full host key validation, so that’s something developers should watch out for.
9. Gosimple
The great thing about this Golang linter is that it focuses on simplifying Go source code. Gosimple always targets the latest Go version, so it requires Go version 1.6 or later.
If there’s a new Go release, gosimple will suggest the easiest and simplest methods to avoid complicated constructs.

10. Go Vendor
Go Vendor is the Golang tool that works with the standard Vendor folder. It allows developers to copy existing dependencies from $GOPATH with govendor add/update. You can also directly pull new dependencies or update existing dependencies with govendor fetch and move legacy systems with govendor migrate.

Wrapping It Up
If you’re coming from a JS/Node background, you need to learn some new programming concepts such as coroutines, channels, strict typing with compilation, interfaces, structs, pointers, and some other differences. But, once you get into the groove, you’ll find Golang easier and faster to use.
Mysqldump Command - Useful Usage Examples
One of the tasks a sysadmin will always have on their list is backing up databases. These backups are also called dump files because, usually, they are generated with mysqldump command.
I am going to share a few tricks on mysqldump that will help when handling servers with many relatively small databases.
The most simple way to backup databases would be using mysqldump command with the the --all-databases attribute. But I find that having each database saved in its own file more convenient to use.
Lets first suppose that you need to run a script that alters in databases, and that you just need a simple way to have a rollback point, just in case. I used to run something like this before:
for i in \
`ls /var/lib/mysql/`; \
do mysqldump -u root -p*** --skip-lock-tables --skip-add-locks --quick --single-transaction $i > $i.sql; done
where *** is your root password. The aditional parameters --skip-lock-tables --skip-add-locks --quick --single-transaction assure availability and consistency of dump file for InnoDB databases (the default storage engine as of MySQL 5.5.5).
Mysql stores databases in folders using same name as database name in /var/lib/mysql. The command picks database names from the listing of /var/lib/mysql folder and exports to files using same name adding the .sql.
There are 2 issues with the above command:
- It will try to execute a dump for every file/folder listed in
/var/lib/mysql. So if you have error logs or whatever other files it will create.sqldumps for them too. This will send just directory names as database names to export:for i in \ `find /var/lib/mysql/ -type d | sed 's/\/var\/lib\/mysql\///g'`;\ do mysqldump -u root -p*** --skip-lock-tables --skip-add-locks --quick --single-transaction $i > $i.sql; done
I find this to be hard to type and prefer to use one I will explain in point 2, since it also covers this.
- When database names have characters like
-the folder name will have@002instead. If that is the case, you can use something like:for i in \ `mysql -u root -p*** -e 'show databases'`;\ do mysqldump -u root -p*** --skip-lock-tables --skip-add-locks --quick --single-transaction $i > $i.sql;done
This picks database names to export form mysql
show databasescommand.
But, one time I had to export databases with / in their names. And there is no way to export as I showed above, since / can't be used in file names since it is actually a markup for directories. So I did this:
for i in \
`mysql -u root -p*** -e 'show databases'`;\
do mysqldump -u root -p*** --skip-lock-tables --skip-add-locks --quick --single-transaction $i > `echo $i | sed "s/\//_/g"`.sql;done
This wil replace / with _ for the dump file names.
For all of the above, we could (for obvious reasons) not use root mysql user. We could also run the backing up from a different location. In order to do this, we would need to create a mysql user with the right privileges on the machine we want to back up.
create user 'backupuser'@'111.222.333.444' identified by 'backuppassword';

grant select, show view, trigger, lock tables, reload, show databases on *.* to 'backupuser'@'111.222.333.444';
flush privileges;
where 111.222.333.444 is the ip of the remote machine.
Now you can issue mysqldump command from the other machine like this:
for i in \
`mysql -u backupuser -pbackuppassword -e 'show databases'`;\
do mysqldump -u backupuser -pbackuppassword -h 444.333.222.111 --skip-lock-tables --skip-add-locks --quick --single-transaction $i > `echo $i | sed "s/\//_/g"`.sql;done
where 444.333.222.111 is the ip of the machine we want to backup.
Lets take it to the next step , and put all our knowledge in a shell script.
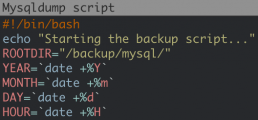
#!/bin/bash
echo "Starting the backup script..."
ROOTDIR="/backup/mysql/"
YEAR=`date +%Y`
MONTH=`date +%m`
DAY=`date +%d`
HOUR=`date +%H`
SERVER="444.333.222.111"
BLACKLIST="information_schema performance_schema"
ADDITIONAL_MYSQLDUMP_PARAMS="--skip-lock-tables --skip-add-locks --quick --single-transaction"
MYSQL_USER="backupuser"
MYSQL_PASSWORD="backuppassword"

# Read MySQL password from stdin if empty
if [ -z "${MYSQL_PASSWORD}" ]; then
 echo -n "Enter MySQL ${MYSQL_USER} password: "
 read -s MYSQL_PASSWORD
 echo
fi

# Check MySQL credentials
echo exit | mysql --user=${MYSQL_USER} --password=${MYSQL_PASSWORD} --host=${SERVER} -B 2>/dev/null
if [ "$?" -gt 0 ]; then
 echo "MySQL ${MYSQL_USER} - wrong credentials"
 exit 1
else
 echo "MySQL ${MYSQL_USER} - was able to connect."
fi

#creating backup path
if [ ! -d "$ROOTDIR/$YEAR/$MONTH/$DAY/$HOUR" ]; then
    mkdir -p "$ROOTDIR/$YEAR/$MONTH/$DAY/$HOUR"
    chmod -R 700 $ROOTDIR
fi

echo "running mysqldump"
dblist=`mysql -u ${MYSQL_USER} -p${MYSQL_PASSWORD} -h $SERVER -e "show databases" | sed -n '2,$ p'`
for db in $dblist; do
    echo "Backuping $db"
    isBl=`echo $BLACKLIST |grep $db`
    if [ $? == 1 ]; then
        mysqldump ${ADDITIONAL_MYSQLDUMP_PARAMS} -u ${MYSQL_USER} -p${MYSQL_PASSWORD} -h $SERVER $db | gzip --best > "$ROOTDIR/$YEAR/$MONTH/$DAY/$HOUR/`echo $db | sed 's/\//_/g'`.sql.gz"
        echo "Backup of $db ends with $? exit code"
    else
        echo "Database $db is blacklisted, skipped"
    fi
done
echo
echo "dump completed"
This will also compress the dump files to save storage.
Save the script as backup-mysql.sh somewhere on the machine you want backups saved, ensure you have the mysql user with the right credentials on the server hosting the mysql. You will also need mysql installed on the backup server. Executesudo chmod 700 backup-mysql.sh. Run the script with sudo sh backup-mysql.sh . After making sure it works properly, you can also add it to your crontab, so that it runs on a regular schedule.

7 Mobile App Development Trends That Matter to Your Business
Mobile app development is a growing industry—thanks to the increasing number of smartphone users. According to the Digital in 2017 Global Overview report, 4.92 billion or more than half of the world’s population now uses a smartphone. The Ericsson Mobility Report predicts that there will be a total of 6.1 billion smartphone users by 2020.
As such, the overall usage of mobile apps is on the rise. The Apple App Store already boasts of almost 2 million apps, and it’s predicted that by 2020, global iOS application downloads will be at 35.2 billion. Google Play Store, on the other hand, has over 2.2 million apps, with an astounding prediction of 80.3 billion Android application downloads by 2020.
The statistics above clearly indicate how important it is for businesses to adapt to consumer trends. Some businesses resort to outsourcing app development experts to avoid being left behind. Part of keeping up is being aware of these seven mobile app development trends:

1. Strict Security Measures
Since smartphones hold highly sensitive personal and financial information of every user, stricter security measures are crucial in app development to protect users from hacking and breaches.
A Gartner study claims that 75% of mobile apps would fail even the basic security tests. Some security concerns such as insecure storage, privacy violation, system information leaks, and insecure deployment were also raised by an HPE Cyber Risk Report.
To address such issues, Apple already implemented the mandatory ‘App Transport Security’ feature last January 2017.

2. Augmented Reality and Virtual Reality
Just last year, smartphone users all over the world went crazy for Pokemon Go, which uses augmented reality to seamlessly blend the real world with the pocket monsters’ world. Meanwhile, real estate companies are adopting virtual reality apps to let home buyers feel what it’s like to live in the homes they sell.
Aside from gaming and real estate, we will see an upsurge in AR and VR apps in the coming years. Fashion, retail, TV, and other businesses will see the benefits of using AR and VR to woo consumers into buying their products.

3. Hybrid Apps for Enterprises
As more enterprises embrace the “bring your own device” model, and more workers are using mobile devices for work, the demand for hybrid apps will increase. A recent study shows that more than 72% of organizations are already starting to adopt BYOD models.
Hybrid apps are essentially mobile websites that run in an app form. Hybrid apps are responsive to multiple operating systems and devices—from smartphones and tablets to laptops and desktops.
Businesses will continue to see the benefits of hybrid apps for enterprises. They’re more cost effective and faster to develop.

4. Cloud-Based Mobile Apps
A lot of apps use heavy graphics, illustrations, and functions, and need to be accessible across all platforms. Cloud technologies can also be used to develop mobile apps that require integration with IoT, wearable devices, artificial intelligence, and the like.
Mobile cloud adoption and cloud-based applications will be more widespread. Apps no longer need to take up too much space in the smartphone’s internal memory, as files can be served directly from the cloud.

5. Big Data
Big data analytics has been a crucial tool for businesses and marketing professionals to measure the results of their digital products and investments. With big data integration, businesses, as well as developers, will be able to track user behavior that would help them arrive at informed decisions when updating mobile app UX and UI.

6. Artificial Intelligence (AI) and Chat Bots
AI and machine learning will help developers write better codes and boost the capabilities and functions of mobile apps. Microsoft's Intellisense is one of the many companies adapting AI and machine learning in their developer tools. Other mobile apps will increasingly feature AI and machine learning capabilities to predict user preference and behavior.
Chat bots are one of the many applications of AI and machine learning in mobile app development. As online shopping becomes more popular, customized and conversational commerce will soon be common, which will be made possible with chat bots.

7. Internet of Things
These days, it’s not just about being connected, it’s about being interconnected. That’s what Internet of Things (IoT) is all about.
Everything now is being made ‘smart’—from smartphones, smart watches, and smart TVs to smart homes and smart offices. Mobile app developers need to consider other devices as well aside from just the smartphone.
These trends are here to stay. Consider these when mapping out business strategies, business owners, entrepreneurs, and marketers. Also, be sure to hire trusted mobile app development companies to help you reach success.